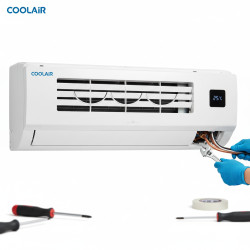
How to Safely Prepare Your AC for Dismounting & Removal
Want this done properly without the hassle?
Aap DIY try kar sakte hain, lekin agar time nahi ya confidence kam ho, to professional bula lena better hota hai. Galat step se damage ya safety issue ho sakta hai.
Quick answer (read this first)
- Power Off Safely at the breaker.
- Visually inspect units for physical damage.
- Check for any signs of refrigerant leaks.
- Examine all electrical wiring and connections.
- Clean the outdoor condenser before handling.
- Verify indoor drainage is clear.
Safety first
- Always turn off the main power supply at the circuit breaker before starting any work; verify no power with a tester.
- Wear safety gloves and eye protection to prevent injuries.
- Never attempt to cut, disconnect, or vent refrigerant lines; this requires specialized tools and professional expertise.
- Do not touch or attempt to repair frayed, cracked, or exposed electrical wires; this poses a severe shock hazard.
- Use a stable and properly secured ladder for accessing the outdoor unit to prevent falls.
- Do not proceed with dismounting if the unit is unstable, heavy, or in a hard-to-reach location without professional help.
Tools you may need
- Screwdriver set (Phillips and flathead)
- Work gloves
- Safety glasses
- Soft brush or cloth for cleaning
- Flashlight (for dark areas)
- Non-contact voltage tester or multimeter (for power verification)
Step-by-step
Step 1
Prioritize Safety: Disconnect Main Power: Locate the main circuit breaker for your AC unit and switch it to the ‘OFF’ position. Crucially, use a non-contact voltage tester or multimeter to confirm that no electrical current is reaching either the indoor or outdoor unit.
Step 2
Conduct a Thorough Visual Inspection: Carefully examine both the indoor (evaporator) and outdoor (condenser) units for any visible signs of physical damage, such as dents, cracks in the casing, loose panels, or significant corrosion. Check the fan blades for damage or obstructions.
Step 3
Check for Refrigerant Leak Indicators: Systematically inspect all copper pipe connections on both units. Look for tell-tale signs of refrigerant leaks, which include oily residue, frosty spots, or unusual ice buildup on the pipes or valves. If detected, stop immediately.
Step 4
Examine Electrical Wiring and Connections: Visually inspect all accessible electrical wires and their connections for any signs of fraying, cracks in insulation, exposed copper, or loose terminals. Do not touch damaged wiring; simply note its condition as a critical issue.
Step 5
Clean the Outdoor Condenser Coils: Gently use a soft brush or cloth to remove any accumulated leaves, dust, dirt, or grime from the outdoor condenser fins. Clean coils improve air circulation, reduce unit weight slightly, and prevent debris from falling during removal. Avoid bending the delicate fins.
Step 6
Verify Indoor Unit Drainage: Inspect the condensate drain pipe leading from your indoor unit. Ensure it is clear of blockages and that there is no water pooling around or underneath the unit, which could lead to spillage during dismounting.
Step 7
Assess Mounting Stability: For wall-mounted outdoor units, thoroughly check the mounting brackets and bolts for any signs of rust, bending, or looseness. Ensure the unit is securely fastened. If the mounting appears compromised, it’s unsafe to proceed yourself.
Common mistakes
- Forgetting to turn off and verify the main power supply, leading to a risk of electric shock.
- Attempting to cut or disconnect refrigerant lines, which is dangerous and environmentally harmful.
- Ignoring visible electrical damage, which can pose severe hazards during handling.
- Not wearing appropriate personal protective equipment like safety gloves and eye protection.
- Trying to force rusted or stuck components, potentially causing further damage to the unit or structure.
- Underestimating the weight of AC units, especially outdoor condensers, and attempting to move them without help.
When to call a professional
- If you detect any refrigerant leakage (indicated by oily residue, frost, or unusual hissing sounds).
- If electrical wires are visibly damaged, exposed, frayed, or sparking.
- If you are unsure how to safely disconnect and verify the power supply.
- If the AC unit is mounted in a hard-to-reach, unstable, or unsafe location.
- For the actual dismounting, recovery of refrigerant, and removal of the AC unit, as it involves specialized tools, knowledge, and physical strength.
- If any part of the AC unit is severely damaged, rusted, or beyond a simple visual check or cleaning.
- If the unit is too heavy or awkwardly positioned for you to safely handle.
Want this done properly without the hassle?
Aap DIY try kar sakte hain, lekin agar time nahi ya confidence kam ho, to professional bula lena better hota hai. Galat step se damage ya safety issue ho sakta hai.