How to Troubleshoot AC Gas Refill R22 Issues at Home
Want this done properly without the hassle?
Aap DIY try kar sakte hain, lekin agar time nahi ya confidence kam ho, to professional bula lena better hota hai. Galat step se damage ya safety issue ho sakta hai.
Quick answer (read this first)
- Check for leaks around the unit.
- Inspect the outdoor condenser for blockages.
- Verify thermostat settings are correct.
- Ensure air filters are clean.
- Look for ice formation on coils.
Safety first
- Always turn off AC power at the breaker before inspection.
- Wear safety gloves and eye protection.
- Never attempt to open refrigerant lines or cylinders.
- Avoid direct contact with refrigerant.
- Work in a well-ventilated area.
Tools you may need
- Screwdriver set
- Cleaning brush or cloth
- Flashlight
- Leak detection spray (optional)
- Multimeter (optional, for basic electrical checks)
Step-by-step
Step 1
Ensure Safety First: Always switch off the AC unit’s power at the main circuit breaker before touching any components. This prevents electric shock.
Step 2
Check Thermostat Settings: Confirm your thermostat is set to ‘Cool’ mode and the temperature is lower than the room’s current temperature. Incorrect settings are a common oversight.
Step 3
Inspect Air Filters & Coils: Open the indoor unit and check if the air filter is clogged. A dirty filter restricts airflow. Also, look for ice formation on the evaporator coils, which can indicate poor airflow or low refrigerant.
Step 4
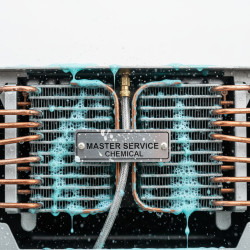
Examine Outdoor Unit for Obstructions: Visually inspect the outdoor condenser for dirt, leaves, grass, or any debris blocking the fins. Clean any obstructions carefully with a soft brush or cloth to ensure proper airflow.
Step 5
Look for Refrigerant Leaks: Carefully inspect copper lines and connections (both indoor and outdoor units) for oily residue or listen for a distinct hissing sound, which are strong indicators of a refrigerant leak. Do not attempt to tighten or repair lines.
Step 6
Restart and Listen for Abnormal Noises: After completing the visual checks, restore power to the AC. Turn it on and listen carefully for any unusual sounds like grinding, buzzing, rattling, or continuous hissing from either unit. These can signal mechanical or refrigerant pressure problems.
Step 7
Assess Cooling Performance: Allow the AC to run for at least 15-20 minutes. Check the air coming from the indoor vents; it should be consistently cool, not just slightly chilled. Poor cooling is a primary sign of issues post-refill.
Step 8
Monitor Outdoor Unit Operation: Observe if the outdoor unit’s fan is spinning freely and if the compressor is cycling on and off normally. Inconsistent operation or the compressor not turning on at all can point to further problems.
Common mistakes
- Forgetting to turn off the power before inspection.
- Mistaking a dirty air filter for a refrigerant issue.
- Attempting to tighten or open refrigerant lines yourself.
- Overlooking simple thermostat setting errors.
- Assuming every cooling problem is a gas issue.
- Not checking for physical obstructions on the outdoor unit.
When to call a professional
- If you detect a strong refrigerant leak.
- The AC unit is not cooling at all despite basic troubleshooting.
- You hear loud, unusual grinding or rattling noises.
- There are electrical issues, such as tripped breakers or burning smells.
- Persistent ice formation on the coils even after cleaning filters.
- If you lack the proper tools, expertise, or feel uncomfortable performing these checks.
Want this done properly without the hassle?
Aap DIY try kar sakte hain, lekin agar time nahi ya confidence kam ho, to professional bula lena better hota hai. Galat step se damage ya safety issue ho sakta hai.