How to Troubleshoot AC General Service Issues at Home

Want this done properly without the hassle?
Aap DIY try kar sakte hain, lekin agar time nahi ya confidence kam ho, to professional bula lena better hota hai. Galat step se damage ya safety issue ho sakta hai.
Quick answer (read this first)
- Check and clean AC air filters
- Verify thermostat settings and remote functionality
- Inspect outdoor unit for blockages
- Clear AC drain pipe blockages
- Reset AC unit if unresponsive
Safety first
- Always switch off the AC at the main breaker before performing any work.
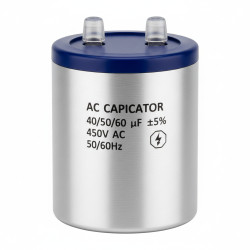
- Never attempt to open or repair electrical components yourself.
- Wear gloves and safety glasses if needed.
- Do not spray water directly on electrical parts.
- If you smell burning or see sparks, immediately turn off the AC and call a professional.
Tools you may need
- Screwdriver (Phillips and Flathead)
- Soft brush or vacuum cleaner
- Mild detergent or soap
- Bucket and cloth
- Flashlight
Step-by-step
Step 1
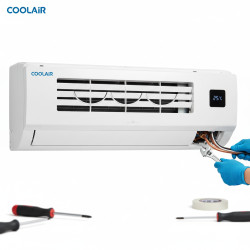
Turn Off Power Safely: Before any inspection or cleaning, always switch off your AC unit at the main electrical breaker for complete safety.
Step 2
Inspect and Clean Indoor Air Filters: Open the indoor unit’s front panel and carefully remove the air filters. Use a soft brush or vacuum to remove dust. If heavily soiled, wash them gently with mild soapy water and rinse thoroughly. Allow filters to dry completely before reinstallation.
Step 3
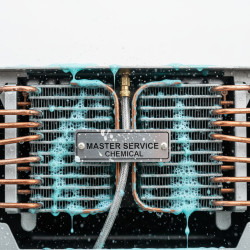
Check Outdoor Unit for Obstructions: Visually inspect the outdoor condenser unit. Remove any leaves, debris, plastic bags, or grass clippings that might be blocking the fins or airflow.
Step 4
Clear the Drain Pipe: Locate the AC drain pipe (usually a PVC pipe extending from the indoor unit). Check for any visible clogs. If accessible and safe, gently flush a small amount of water to ensure it flows freely and is not blocked.
Step 5
Verify Thermostat and Remote Settings: Ensure your thermostat is set to the correct mode (cool) and desired temperature. Check remote control batteries and verify it’s sending signals correctly. Sometimes a simple battery change or setting adjustment can resolve issues.
Step 6
Reset the AC Unit: If the unit is unresponsive or behaving erratically after initial checks, turn off the AC from the main breaker for 10-15 minutes, then restore power. This can sometimes reset the system.
Step 7
Restart and Monitor Performance: After performing these checks and cleaning, replace the filters and unit panels. Turn the main power back on and restart your AC. Listen for any unusual sounds and observe if the cooling performance has improved.
Step 8
Identify Persistent Issues: If issues persist (e.g., still no cooling, strange noises continue), note down the symptoms. This information will be helpful if you need to call a professional.
Common mistakes
- Forgetting to turn off power at the main breaker.
- Using excessive water near electrical parts.
- Neglecting the outdoor unit’s cleanliness.
- Not fully drying filters before reinstallation.
- Attempting electrical repairs without professional expertise.
When to call a professional
- If the AC unit is not turning on at all.
- If there is a refrigerant leak or a strange smell.
- If the outdoor unit is making loud, unusual noises.
- If the AC is blowing warm air despite troubleshooting.
- If you suspect an electrical fault or a complex component failure.
- If water is leaking from the indoor unit excessively.
- For annual deep cleaning and maintenance not covered by basic troubleshooting.
Want this done properly without the hassle?
Aap DIY try kar sakte hain, lekin agar time nahi ya confidence kam ho, to professional bula lena better hota hai. Galat step se damage ya safety issue ho sakta hai.