How to Troubleshoot Automatic Tank Switch Issues at Home
Want this done properly without the hassle?
Aap DIY try kar sakte hain, lekin agar time nahi ya confidence kam ho, to professional bula lena better hota hai. Galat step se damage ya safety issue ho sakta hai.
Starting from
Rs. 800
Quick answer (read this first)
- Check for power supply issues.
- Inspect float sensors for obstructions.
- Examine wiring for loose connections.
- Clean the water tank and sensors.
- Try resetting the ATS unit.
Safety first
- Always turn off the main power supply to the ATS and pump before starting any inspection or repair.
- Do not touch exposed wires with wet hands or if the power is still on.
- Use insulated tools for any electrical work to prevent shocks.
- Wear rubber gloves and safety glasses to protect yourself from water and debris.
- If you detect burnt wires, sparks, or smell burning, stop immediately and contact a qualified electrician or plumber.
Tools you may need
- Screwdriver set (Philips and flathead)
- Multimeter (optional, for voltage checks)
- Clean cloth or sponge
- Flashlight
- Insulation tape (if needed for minor, temporary repairs)
Step-by-step
Step 1
- Safely disconnect power: Locate the main circuit breaker for your ATS unit and water pump and switch it OFF immediately. Verify power is off before proceeding.
Step 2
- Conduct a visual inspection: Carefully examine the ATS unit itself for any visible physical damage, loose wires, burn marks, or unusual odors (e.g., burning plastic or ozone).
Step 3
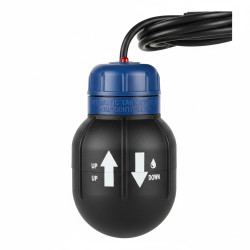
- Inspect float sensors: Open your water tank and check the float sensors. Ensure they can move freely up and down without obstruction and are not stuck in either the ‘on’ or ‘off’ position.
Step 4
- Clean tank and sensors: With power still off, use a clean cloth or sponge to carefully remove any dirt, silt, calcium buildup, or algae from the float sensors and their immediate surroundings within the water tank.
Step 5
- Verify wiring connections: Gently check all accessible wiring connections to the ATS unit, pump, and power source. Ensure they are snug and free from corrosion. Do not attempt complex wiring changes.
Step 6
- Reset the ATS unit: If your ATS model features a reset button, press and hold it firmly for a few seconds. This can often resolve minor glitches after cleaning and inspection.
Step 7
- Restore power and test: Safely restore power to the ATS unit and water pump at the circuit breaker. Observe the system for normal operation, ensuring the power indicator light is on and the pump activates/deactivates correctly based on water levels.
Common mistakes
- Forgetting to turn off the main power supply before beginning any inspection or work.
- Ignoring dirty or stuck float sensors, which are very common causes of ATS malfunction.
- Assuming the ATS is faulty without first checking the water pump itself for issues.
- Attempting to force parts, use incorrect tools, or perform complex electrical repairs without expertise.
- Overlooking a simple tripped circuit breaker or blown fuse as the cause of power loss to the unit.
When to call a professional
- If you detect burnt wires, smoke, a strong electrical smell, or any severe physical damage to the unit.
- If the issue persists after carefully completing all basic troubleshooting steps outlined in this guide.
- If you are uncomfortable, unsure, or lack the necessary experience to work with electrical components safely.
- If the ATS unit requires internal component replacement, complex wiring repairs, or recalibration.
- For persistent water pressure problems, pump motor failures, or issues that seem unrelated to the ATS.
Want this done properly without the hassle?
Aap DIY try kar sakte hain, lekin agar time nahi ya confidence kam ho, to professional bula lena better hota hai. Galat step se damage ya safety issue ho sakta hai.
Starting from
Rs. 800
100% Money Back Guarantee
If you are not satisfied with the service


