
DIY Cabinet Hinge Replacement: Step-by-Step Troubleshooting and When to Call a Professional
Want this done properly without the hassle?
Aap DIY try kar sakte hain, lekin agar time nahi ya confidence kam ho, to professional bula lena better hota hai. Galat step se damage ya safety issue ho sakta hai.
Quick answer (read this first)
- Replace broken hinges with matching ones using a screwdriver and spare hinges; if the wood is split, hinges are rusted beyond repair, or doors won’t align after replacement, call a professional.
Safety first
- Wear safety goggles to protect your eyes from flying screws or wood debris.
- Turn off gas lines or water supplies if working near kitchen cabinets with connected utilities.
- Use a sturdy step stool or ladder—never stand on chairs, boxes, or unstable surfaces.
- Avoid forcing stuck screws—this can snap hardware or splinter Pakistani plywood, creating sharp edges.
Tools you may need
- Phillips screwdriver
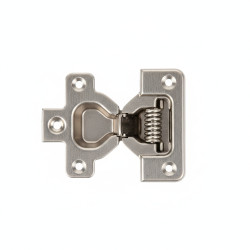
- New cabinet hinges (match size, style, and material)
- Measuring tape or ruler
- Wood filler suitable for plywood
- Medium-grit sandpaper
- Hammer (for gently tapping stubborn screws)
- Small chisel or utility knife (for cleaning out stripped holes)
Step-by-step
Step 1
Remove the cabinet door by carefully unscrewing all hinge screws—place screws in a labeled container to avoid loss.
Step 2
Take the old hinge to a local hardware store to find an exact match in size, curvature, and mounting style—common in Pakistani kitchen cabinets.
Step 3
If screw holes are stripped or enlarged, clean them out, apply wood filler, and let dry for at least 2 hours.
Step 4
Sand the filled holes smooth with medium-grit paper, then mark the exact position for the new hinge using a pencil.
Step 5
Attach the new hinge to the cabinet frame first with one screw per hinge—do not fully tighten yet to allow alignment adjustments.
Step 6
Rehang the door and check alignment: open and close it slowly to ensure no rubbing, gaps, or misalignment.
Step 7
Once aligned, fully tighten all screws—stop if resistance increases sharply to avoid stripping plywood.
Step 8
Test the door’s operation 5–10 times to confirm smooth closing and proper latch engagement.
Common mistakes
- Using mismatched hinges—causes doors to sag, rub, or fail to close properly in humid Pakistani climates.
- Over-tightening screws—strips soft plywood common in local cabinets and breaks hinge plates.
- Skipping wood filler for stripped holes—leads to immediate re-loosening of new screws.
- Ignoring rust or bent hinges—replacing only visible parts without addressing underlying damage.
- Not matching hinge types (e.g., overlay vs. inset)—results in poor door fit and uneven gaps.
- Working without proper lighting—leads to misaligned holes and damaged cabinet surfaces.
When to call a professional
- If the cabinet frame is cracked, warped, or has deep wood damage beyond surface repair.
- If multiple hinges are broken and original hardware cannot be matched locally.
- If doors still misalign after replacing hinges and filling stripped holes.
- If you’re unsure about hinge types, cabinet construction, or structural integrity.
- If the cabinet is part of a built-in unit with hidden fasteners or complex joinery.
Want this done properly without the hassle?
Aap DIY try kar sakte hain, lekin agar time nahi ya confidence kam ho, to professional bula lena better hota hai. Galat step se damage ya safety issue ho sakta hai.




