How to Troubleshoot Ceiling Clothes Hanger Install Issues at Home
Want this done properly without the hassle?
Aap DIY try kar sakte hain, lekin agar time nahi ya confidence kam ho, to professional bula lena better hota hai. Galat step se damage ya safety issue ho sakta hai.
Quick answer (read this first)
- Check all mounting screws and anchors for looseness.
- Inspect ropes and pulleys for fraying or damage.
- Ensure clothes are evenly distributed to prevent imbalance.
- Verify the hanger’s level and alignment.
Safety first
- Always use a stable ladder or step stool.
- Wear protective gloves to prevent injury.
- Have a second person assist you, especially when working at height.
- Never exceed the hanger’s recommended weight capacity.
- Be aware of electrical wiring in the ceiling before drilling or making repairs.
Tools you may need
- Screwdriver set (Phillips and Flathead)
- Wrench or pliers
- Measuring tape
- Pencil
- Spirit level (optional, for precision)
- Drill (if new holes or reinforcement are needed)
- Wall plugs/anchors (if needed)
- Replacement rope/pulley (if needed)
Step-by-step
Step 1
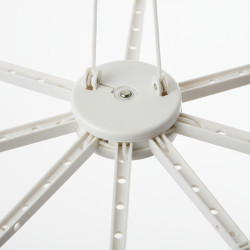
Inspect Mounting Points: Carefully examine all screws, bolts, and anchors securing the hanger to the ceiling. Tighten any fasteners that appear loose or wobbly.
Step 2
Check Ropes and Pulleys: Look for any fraying, knots, or damage in the ropes. Test each pulley to ensure it moves smoothly; replace if it’s stiff, jammed, or broken.
Step 3
Clear Obstructions: Ensure no clothes, fabric, or debris are blocking the hanger’s movement or snagging the ropes. Clear any impediments around the pulleys.
Step 4
Verify Level and Alignment: Use a measuring tape and a spirit level (if available) to confirm the hanger rods are perfectly level and parallel. Adjust the mounting hardware if the hanger is crooked.
Step 5
Assess Weight Distribution: Always distribute wet clothes evenly across all rods. Overloading one side can stress the mounting, damage components, or cause the hanger to tilt.
Step 6
Replace Damaged Parts: If ropes are frayed or pulleys are non-functional, purchase and replace them with new, durable components available at local hardware stores. Ensure correct length and type.
Step 7
Reinforce Mounting (If Necessary): If the hanger frequently detaches or feels unstable, remove it and use stronger wall plugs or anchors appropriate for your specific ceiling material (e.g., concrete, plasterboard).
Common mistakes
- Ignoring minor looseness, which can lead to larger structural issues.
- Using weak anchors that are not suitable for the hanger’s load or ceiling type.
- Not replacing visibly worn or damaged ropes and pulleys promptly.
- Overloading the hanger with too many heavy, wet clothes.
- Improperly threading ropes through pulleys, causing friction or snagging.
When to call a professional
- If you are uncertain about the structural integrity of your ceiling.
- When there is significant existing damage to the ceiling that requires repair.
- If you accidentally expose or damage electrical wiring during the process.
- For complex issues that go beyond simple tightening or component replacement.
- If you do not have the necessary tools or experience to perform the repair safely.
- If the problem persists even after trying all troubleshooting steps.
Want this done properly without the hassle?
Aap DIY try kar sakte hain, lekin agar time nahi ya confidence kam ho, to professional bula lena better hota hai. Galat step se damage ya safety issue ho sakta hai.