How to troubleshoot Door Stopper Installation issues at home
Want this done properly without the hassle?
Aap DIY try kar sakte hain, lekin agar time nahi ya confidence kam ho, to professional bula lena better hota hai. Galat step se damage ya safety issue ho sakta hai.
Quick answer (read this first)
- Tighten loose screws.
- Confirm optimal placement.
- Assess wall or floor anchorage.
- Replace worn or damaged parts.
Safety first
- Wear safety glasses to protect eyes from debris.
- Use the correct tool for each task to avoid injury.
- Be mindful of finger placement when using tools.
- Keep small parts away from children and pets.
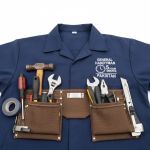
Tools you may need
- Screwdriver set (Phillips and Flathead)
- Drill (if new holes are needed)
- Pencil
- Measuring tape
- Wall plugs/anchors (if installing on plaster/drywall)
- Small hammer (for anchors)
Step-by-step
Step 1
Diagnose the Issue: Observe the door stopper’s behavior. Is it loose, bent, misaligned, or completely detached? Identify the specific problem area to guide your fix.
Step 2
Tighten All Fasteners: Using the appropriate screwdriver, firmly tighten any visible screws on the door stopper, its base, and any mounting plates. Avoid overtightening.
Step 3
Confirm Optimal Placement: With the door fully open, ensure the stopper makes contact with the door at a point that prevents the handle or door edge from striking the wall or furniture. Adjust its position if misaligned.
Step 4
Examine Wall/Floor Anchorage: If the stopper is wobbly or detached from the surface, inspect the mounting area. Look for stripped screw holes, cracked plaster/drywall, or loose anchors.
Step 5
Reinforce or Re-anchor: If existing anchors are damaged, carefully remove them. Drill a new pilot hole a short distance away (if possible), insert a suitable wall plug or anchor, and re-mount the stopper. For wood, use longer or thicker screws.
Step 6
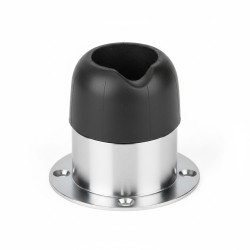
Inspect and Replace Worn Parts: Check the rubber bumper or tip of the stopper for cracks, tears, or significant wear. A damaged bumper won’t absorb impact effectively; replace it with a new one if necessary.
Step 7
Final Functionality Test: Gently open and close the door multiple times, allowing it to contact the stopper. Ensure the stopper holds firmly in place and effectively prevents damage without shifting or detaching.
Common mistakes
- Not tightening screws enough, leading to recurring looseness.
- Using the wrong type of anchor for the wall/floor material.
- Incorrect placement leading to the door handle still hitting the wall.
- Ignoring a worn-out rubber tip, reducing impact absorption.
- Overtightening screws and stripping the threads or damaging the material.
When to call a professional
- If the wall or floor material is severely damaged around the stopper and needs extensive repair.
- If you lack the right tools or confidence to drill new holes and properly secure the stopper.
- If the issue persists despite troubleshooting efforts, indicating a deeper problem.
- If the door or door frame itself is damaged and requires professional carpentry.
- For complex installations or extensive home repairs beyond your comfort level.
Want this done properly without the hassle?
Aap DIY try kar sakte hain, lekin agar time nahi ya confidence kam ho, to professional bula lena better hota hai. Galat step se damage ya safety issue ho sakta hai.