How to Perform a Drawer Lock Safety Check and Quick Fixes
Want this done properly without the hassle?
Aap DIY try kar sakte hain, lekin agar time nahi ya confidence kam ho, to professional bula lena better hota hai. Galat step se damage ya safety issue ho sakta hai.
Quick answer (read this first)
- Inspect the lock for any looseness or visible damage.
- Check if the key turns smoothly without sticking or resistance.
- Gently tighten all mounting screws for the lock mechanism and strike plate.
- Apply a suitable lubricant to sticky lock mechanisms to restore smooth operation.
Safety first
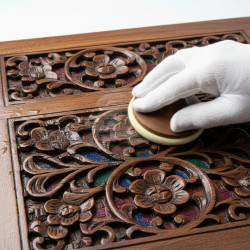
- Always wear appropriate gloves if handling potentially sharp edges or metal shavings.
- Keep all small components, such as screws and springs, safely out of reach of children.
- Never force a key into a jammed or resistant lock; this can cause severe damage or break the key.
- Ensure the drawer is completely empty and stable before attempting any checks or repairs.
Tools you may need
- Screwdriver set (Phillips and Flathead)
- Lubricant spray (e.g., WD-40 or silicone spray)
- Clean cloth or tissue
- Small brush (optional, for detailed cleaning)
Step-by-step
Step 1
Completely empty the drawer to gain full and unobstructed access to the lock mechanism and its components.
Step 2
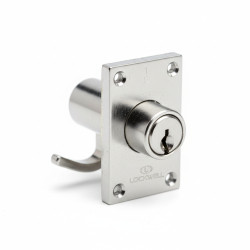
Conduct a thorough visual inspection of the entire lock assembly, including the lock body, strike plate, and drawer, for any signs of damage, wear, or loose parts.
Step 3
Systematically check and gently tighten all mounting screws that secure both the lock mechanism within the drawer and the strike plate on the drawer frame using the correct screwdriver.
Step 4
Carefully insert the key and turn it slowly. Observe the lock’s operation; note any stiffness, grinding, or points where it catches or resists.
Step 5
If the lock feels stiff or gritty, apply a small, controlled amount of lubricant spray directly into the keyhole and onto any visible moving parts of the mechanism. Operate the key several times to distribute the lubricant evenly.
Step 6
Verify the drawer’s alignment. Ensure the drawer closes perfectly, and the lock’s bolt aligns precisely with the strike plate without requiring any force or adjustment.
Step 7
Perform multiple tests by locking and unlocking the drawer repeatedly to confirm the mechanism now operates smoothly, securely, and consistently.
Step 8
After lubrication, wipe away any excess spray with a clean cloth, ensuring the area is dry and free of residue.
Common mistakes
- Over-tightening screws, which can easily strip threads in wood or metal components.
- Using general-purpose oils or unsuitable lubricants that can attract dust, leading to a gummed-up mechanism.
- Forcing a key into a stubborn lock, which frequently results in a broken key or a more severely damaged lock cylinder.
- Neglecting minor operational issues, allowing them to worsen into complex and expensive repair problems over time.
When to call a professional
- The lock mechanism is entirely jammed, and you are unable to free it using basic troubleshooting steps.
- The key breaks off inside the lock cylinder, obstructing its operation.
- You discover significant structural damage to the drawer itself or the lock housing that is beyond your DIY repair capabilities.
- Despite your checks and quick fixes, you cannot identify the underlying cause of the lock malfunction.
- A complete replacement of the lock is required, especially if it involves a more intricate or specialized locking system.
Want this done properly without the hassle?
Aap DIY try kar sakte hain, lekin agar time nahi ya confidence kam ho, to professional bula lena better hota hai. Galat step se damage ya safety issue ho sakta hai.