How to Fix Common Furniture Touch-Up Issues at Home
Want this done properly without the hassle?
Aap DIY try kar sakte hain, lekin agar time nahi ya confidence kam ho, to professional bula lena better hota hai. Galat step se damage ya safety issue ho sakta hai.
Quick answer (read this first)
- Thoroughly inspect your furniture immediately after a touch-up service for any imperfections.
- Pinpoint specific issues such as streaks, color mismatches, or rough patches.
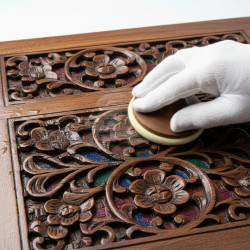
- Gently clean the affected area and use fine-grit sandpaper for minor surface flaws.
- Carefully apply matching touch-up paint or polish to blend and restore the finish.
Safety first
- Work in a well-ventilated area to avoid fumes.
- Wear gloves to protect your hands from finishes and chemicals.
- Use eye protection when sanding or working with abrasive materials.
- Keep children and pets away from the work area and tools.
- Always read and follow product labels for specific safety instructions.
Tools you may need
- Soft, lint-free cloths
- Fine-grit sandpaper (400-600 grit)
- Mild cleaner (e.g., diluted dish soap)
- Matching touch-up paint or stain (if available)
- Small artist’s brush or cotton swabs
- Furniture wax or polish
Step-by-step
Step 1
Step 1: Assess the Imperfection
Step 2
Examine the touched-up area closely under strong, direct light.
Step 3
Identify specific issues such as streaks, brush marks, uneven color, rough textures, or small smudges.
Step 4
Determine the exact nature and extent of each flaw before proceeding.
Step 5
Step 2: Clean the Surface
Step 6
Dampen a soft, lint-free cloth with a mild cleaner (like diluted dish soap or a furniture cleaner).
Step 7
Gently wipe the affected area to remove any dust, grime, or oily residues.
Step 8
Ensure the surface is completely clean and dry before applying any new treatments.
Step 9
Step 3: Gently Smooth Rough Patches or Minor Scratches
Step 10
For small rough textures or very light surface scratches, use 600-grit sandpaper or a superfine abrasive pad.
Step 11
Rub extremely gently, always moving in the direction of the wood grain.
Step 12
Be cautious not to sand through the finish or damage the wood underneath.
Step 13
Wipe away all dust with a clean, dry cloth.
Step 14
Step 4: Rectify Color Discrepancies
Step 15
If there’s a slight color mismatch, select a touch-up paint or stain that closely matches your furniture’s existing finish.
Step 16
Apply a tiny amount using a small artist’s brush or cotton swab.
Step 17
Gently feather out the edges to blend the new color seamlessly into the surrounding area.
Step 18
Apply in thin layers, allowing each layer to dry completely before adding more, until the color is consistent.
Step 19
Step 5: Correct Uneven Finish Application (Streaks or Excess)
Step 20
If the touch-up appears streaky or has built-up excess finish, very lightly buff the area.
Step 21
Use a fine-grit sanding sponge or a soft cloth with a very mild abrasive (like furniture polish designed for buffing).
Step 22
Work gently in small circular motions to level the finish.
Step 23
Wipe clean with a dry, lint-free cloth after buffing.
Step 24
Step 6: Apply a Protective Topcoat
Step 25
Once all repairs are dry and satisfactory, apply a thin, even coat of furniture wax or polish.
Step 26
Choose a product that matches your furniture’s existing finish (e.g., matte, satin, gloss).
Step 27
Buff gently with a clean, soft cloth, blending the new application seamlessly into the surrounding original finish.
Step 28
Allow adequate time for the protective finish to cure according to product instructions.
Common mistakes
- Using an incorrect color or type of finish that doesn’t match.
- Sanding too aggressively, which can damage the underlying wood.
- Applying too much touch-up product at once, leading to a visible patch.
- Not allowing adequate drying time between cleaning, sanding, and applying new finishes.
- Ignoring safety precautions for ventilation and personal protection.
When to call a professional
- If the damage is extensive, deep, or affects the structural integrity of the furniture.
- When you are dealing with antique, valuable, or heirloom furniture that requires specialized care.
- If you are unsure about the type of wood or the existing finish.
- When your attempts to fix the issue worsen the problem or create new damage.
- If the issue involves complex repairs that go beyond simple touch-ups, such as significant dents or chips.
Want this done properly without the hassle?
Aap DIY try kar sakte hain, lekin agar time nahi ya confidence kam ho, to professional bula lena better hota hai. Galat step se damage ya safety issue ho sakta hai.