How to Troubleshoot Generator Changeover Switch Issues at Home
Want this done properly without the hassle?
Aap DIY try kar sakte hain, lekin agar time nahi ya confidence kam ho, to professional bula lena better hota hai. Galat step se damage ya safety issue ho sakta hai.
Quick answer (read this first)
- Prioritize safety: always switch off ALL power sources (grid and generator) before inspection.
- Visually inspect the switch for physical damage, burnt spots, or loose connections.
- Test the switch’s mechanical operation for smooth movement between positions.
- Ensure all wiring connections are secure and properly earthed.
- If serious damage is detected or the issue persists, call a certified electrician immediately.
Safety first
- Fatal shock risk: Always confirm both the main grid supply and the generator are completely switched off and disconnected from the power source before touching the changeover switch. Use a voltage tester if available to verify no live current.
- Never work on live electrical circuits; even minor mistakes can be life-threatening.
- Use only insulated tools suitable for electrical work to prevent short circuits and shocks.
- Ensure your working area is dry, well-lit, and clear of obstructions to prevent accidents.
- If you encounter sparks, smoke, a burning smell, or feel uncomfortable at any point, stop immediately and call a qualified electrician.
- Do not attempt to bypass safety features or perform repairs beyond your skill level or comfort zone.
Tools you may need
- Insulated screwdriver set (Phillips and flathead)
- Multimeter (for checking voltage and continuity, highly recommended)
- Wire strippers/cutters (if wire repair or replacement is needed)
- Flashlight or headlamp
- Electrical safety gloves (if available)
Step-by-step
Step 1
1. Prioritize Power Disconnection: Crucially, locate and turn off the main circuit breaker for your home’s grid supply. Next, switch off and disconnect your generator completely. Confirm no power is reaching the changeover switch using a voltage tester if available. Verify all power indicators are off.
Step 2
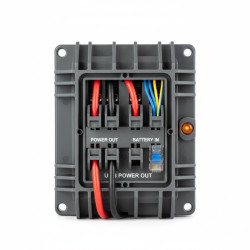
2. Conduct Initial Visual Inspection: Carefully open the changeover switch cover. Look for any obvious signs of damage such as burnt marks, melted plastic components, discolored wires, or unusual odors. Check for pests or debris inside the housing.
Step 3
3. Check for Loose or Damaged Wiring: Gently inspect all wires connected to the switch terminals. Look for frayed insulation, exposed conductors, or signs of corrosion. Gently tug on each wire to ensure it is securely seated in its terminal. Tighten any loose terminal screws with an insulated screwdriver.
Step 4
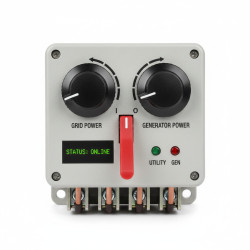
4. Assess Switch Mechanism Functionality: Operate the changeover lever or knob manually between the “Grid” and “Generator” positions. It should move smoothly without excessive force and click firmly into each position. Check if the switch feels loose, stiff, or jammed.
Step 5
5. Verify Earthing and Grounding Connections: Locate the earthing wire (usually green or green/yellow) connected to the switch’s metal casing. Ensure this connection is tight, secure, and free from rust or corrosion. A proper earth connection is vital for safety.
Step 6
6. Perform Continuity/Voltage Tests (with Multimeter): If you have a multimeter and know how to use it, test for continuity across the switch terminals in both “Grid” and “Generator” positions (with all power OFF). You can also carefully test for voltage presence at input/output terminals after restoring partial power (grid OR generator, but NEVER both simultaneously) to isolate where power flow is failing, always keeping safety paramount.
Step 7
7. Test with Power (Cautiously): After ensuring everything is secure and connections are tight, first restore main grid power only. Test if your home receives grid power. Then, turn off grid power again. Start your generator and restore generator power only. Test if your home receives generator power. Observe for any flickering, partial power, or unusual noises during the transition.
Common mistakes
- Failing to completely disconnect both grid and generator power sources before starting inspection or repair, risking severe electric shock.
- Overlooking subtle signs of damage like minor discoloration, slight loosening of connections, or minor corrosion, which can escalate.
- Using non-insulated or incorrect tools, leading to potential short circuits, damage to the switch, or injury.
- Attempting to force a stuck switch lever or internal mechanism, which can cause irreversible mechanical damage.
- Assuming the changeover switch is the sole problem without checking the health of the main grid supply or the generator’s output independently.
- Not verifying earthing connections, compromising the overall electrical safety of your system.
- Ignoring the manufacturer’s instructions or safety guidelines specific to your switch model.
When to call a professional
- If you detect any burning smell, see smoke, sparks, or melted components emanating from the switch.
- If the changeover switch is physically broken, cracked, severely corroded, or difficult to operate even after basic checks.
- If troubleshooting reveals internal wiring damage, faulty terminals that cannot be easily fixed, or issues requiring component replacement.
- If the issue persists despite following all troubleshooting steps, indicating a deeper electrical fault that requires expert diagnosis.
- If you lack confidence, experience, or the necessary specialized tools to safely perform any of the troubleshooting or repair steps.
- For any complete changeover switch installation, upgrade, or complex wiring modifications within your home’s electrical system.
Want this done properly without the hassle?
Aap DIY try kar sakte hain, lekin agar time nahi ya confidence kam ho, to professional bula lena better hota hai. Galat step se damage ya safety issue ho sakta hai.