How to Perform a Basic Home Safety Check & Quick Fixes in 4 Hours

Want this done properly without the hassle?
Aap DIY try kar sakte hain, lekin agar time nahi ya confidence kam ho, to professional bula lena better hota hai. Galat step se damage ya safety issue ho sakta hai.
Quick answer (read this first)
- Perform essential home safety checks and quick fixes efficiently within 4 hours.
- Regular, minor attention prevents costly major repairs later.
- Prioritize critical areas like electricals, plumbing, and structural integrity.
- Simple DIY solutions can significantly enhance home safety.
Safety first
- Always switch off power at the main breaker before touching electrical outlets or fixtures.
- Wear gloves for protection against dirt and splinters.
- Do not attempt complex electrical wiring or major plumbing repairs.
- Ensure proper ventilation when using any sprays or chemicals.
- Use a stable step stool or ladder for tasks at height and have someone spot you.
Tools you may need
- Screwdriver set (flathead and Phillips)
- Pliers
- Measuring tape
- Hammer
- Adjustable wrench
- Flashlight
- Work gloves
- Lubricating oil (e.g., WD-40)
- Utility knife
- Duct tape or electrical tape
- Small step stool or ladder
Step-by-step
Step 1
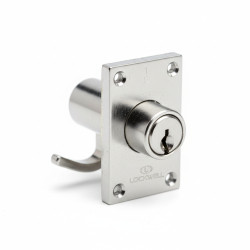
Door & Window Security Check: Inspect all main entry doors and windows. Ensure locks, latches, and hinges function smoothly. Lubricate sticky locks and tighten any loose screws.
Step 2
Electrical Outlet & Switch Scan: Visually check all accessible electrical outlets and light switches. Look for visible damage, loose covers, or flickering lights. Confirm all covers are securely fastened; never open any electrical components.
Step 3
Under-Sink Leak Detection: Examine under kitchen and bathroom sinks for any signs of water leaks, dampness, or drips. Gently tighten any visible loose pipe connections or compression nuts.
Step 4
Lighting Fixture & Bulb Functionality: Verify all light bulbs are working and ensure light fixtures are securely mounted. Replace any burnt-out bulbs and tighten loose fixture screws.
Step 5
Drainage System Clean-Up: Clear visible drain openings in sinks, showers, and bathtubs of hair, soap scum, and debris. Use a small hook or drain snake for minor clogs.
Step 6
Furniture & Fixture Stability: Assess the stability of chairs, tables, and wall-mounted shelves. Tighten any loose screws or bolts on furniture and fixtures to prevent wobbling or collapse.
Step 7
Draft & Pest Sealing: Identify small cracks or gaps around doors and windows. Seal minor gaps using caulk or weatherstripping tape to prevent drafts and pest entry.
Common mistakes
- Ignoring small issues until they become major, costly problems.
- Using the wrong tools for the job, leading to damage or injury.
- Over-tightening screws or pipe connections, which can strip threads or cause leaks.
- Attempting electrical or plumbing repairs without turning off the main power or water supply.
- Not cleaning up the work area after completing a repair, leaving debris or hazards.
When to call a professional
- If you encounter major electrical issues like sparking outlets, frequent circuit breaker trips, or burning smells.
- For persistent plumbing leaks, burst pipes, water heater issues, or major drain blockages.
- When you notice structural damage to walls, ceilings, or foundations.
- If you suspect a gas leak (evacuate immediately and call emergency services).
- For any repairs that require specialized tools, extensive knowledge, or where you feel unsafe.
- If the issue is beyond a simple quick fix or you are unsure about how to proceed safely.
Want this done properly without the hassle?
Aap DIY try kar sakte hain, lekin agar time nahi ya confidence kam ho, to professional bula lena better hota hai. Galat step se damage ya safety issue ho sakta hai.