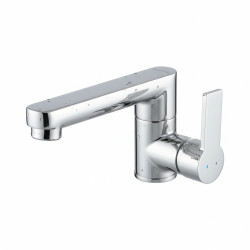
How to Troubleshoot Mixer Tap Installation Issues at Home
Want this done properly without the hassle?
Aap DIY try kar sakte hain, lekin agar time nahi ya confidence kam ho, to professional bula lena better hota hai. Galat step se damage ya safety issue ho sakta hai.
Quick answer (read this first)
- Confirm all water supply valves (main and under-sink) are completely open.
- Inspect flexible hoses for kinks, damage, or insecure connections.
- Clean the aerator if you have poor or inconsistent water flow.
- Carefully check all connections for leaks after tightening and resuming water supply.
Safety first
- Always turn off the main water supply before starting any work to prevent flooding.
- Wear appropriate safety gloves to protect your hands.
- Handle tools carefully to avoid injuries.
- Do not over-tighten connections, as this can damage pipes or fittings.
Tools you may need
- Adjustable spanner or wrench
- Plumber’s tape (PTFE tape)
- Screwdriver set
- Bucket or old cloths for spills
- Flashlight (optional, for dark spaces)
Step-by-step
Step 1
Preparation: Turn Off Water Supply: Locate and turn off the main water supply to your home or the specific area (kitchen/bathroom) where the mixer tap is installed. This is crucial before any inspection.
Step 2
Inspect Supply Hoses for Kinks/Damage: Examine the hot and cold flexible hoses connected to the mixer tap. Look for any visible kinks, sharp bends, or physical damage that could restrict water flow or indicate a fault from installation.
Step 3
Verify Stopcock Positions: Confirm that the individual stopcocks (angle valves) for hot and cold water, typically found under the sink or basin, are fully open. Sometimes they are accidentally left partially closed after installation.
Step 4
Check for Loose Connections: Gently inspect all threaded connections under the sink, including those connecting the flexible hoses to the stopcocks and the mixer tap. Use an adjustable spanner to snug them up, but avoid over-tightening.
Step 5
Address Leaks at Connections: If you observe dripping or minor leaks, turn off the water again. Unscrew the problematic connection, apply new plumber’s tape (PTFE tape) clockwise around the threads, and re-tighten firmly. This often resolves leaks from improper initial sealing.
Step 6
Clean the Aerator (Low Flow): If low or inconsistent water pressure persists, carefully unscrew the aerator (the mesh cap at the tip of the tap’s spout). Rinse it thoroughly to remove any debris, mineral buildup, or installation-related particles that might be clogging it.
Step 7
Test System and Re-check: Once all adjustments are made, slowly turn the main water supply back on. Run the mixer tap, checking both hot and cold flow. Carefully inspect all connections again for any new or persistent leaks over several minutes.
Common mistakes
- Forgetting to turn off the main water supply before beginning work.
- Over-tightening nuts and connections, which can strip threads or crack pipes.
- Not checking individual hot/cold water stopcocks for being partially closed.
- Ignoring low water pressure caused by a clogged tap aerator.
- Failing to use plumber’s tape on threaded connections when necessary.
When to call a professional
- If water pressure remains extremely low or non-existent after troubleshooting.
- If leaks persist despite following all troubleshooting steps.
- If you encounter a burst pipe or significant water damage.
- If you are uncomfortable performing any of the steps or lack the proper tools.
- For complex issues involving concealed piping or major fixture replacement.
Want this done properly without the hassle?
Aap DIY try kar sakte hain, lekin agar time nahi ya confidence kam ho, to professional bula lena better hota hai. Galat step se damage ya safety issue ho sakta hai.


