How to do a basic Peep Hole Installation safety check and quick fixes
Want this done properly without the hassle?
Aap DIY try kar sakte hain, lekin agar time nahi ya confidence kam ho, to professional bula lena better hota hai. Galat step se damage ya safety issue ho sakta hai.
Quick answer (read this first)
- Regularly inspect for clear vision, proper alignment, and secure fitting.
- Clean lenses with a soft cloth and mild cleaner.
- Gently tighten any loose components.
- If issues persist or damage is severe, consult a professional.
Safety first
- Always check from a safe distance before approaching the door.
- Do not forcefully attempt to remove or adjust a stuck or jammed peep hole.
- Avoid using harsh or abrasive cleaners that can scratch the lens and impair vision.
- When working on the peep hole from the inside, ensure the door is securely closed and locked if possible.
Tools you may need
- Soft, lint-free cloth
- Mild glass cleaner or water
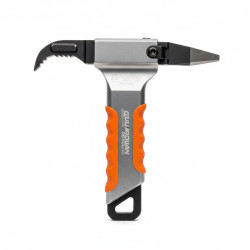
- Small screwdriver (flathead or Phillips, depending on peep hole design)
Step-by-step
Step 1
Inspect Internal View: From inside, look through the peep hole. Check for any blurriness, cracks, or obstructions that impair your view.
Step 2
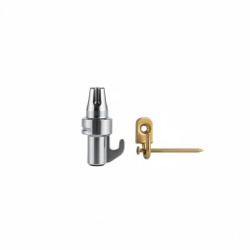
Examine External Components: Carefully open the door to inspect the outer part of the peep hole. Look for physical damage, loose pieces, or signs of attempted tampering.
Step 3
Clean Lenses for Clarity: If the view is unclear, gently wipe both the inner and outer lenses using a soft, lint-free, damp cloth. For stubborn grime, apply a small amount of mild glass cleaner to the cloth, not directly to the lens.
Step 4
Check for Loose Fitting: Gently attempt to rotate the inner part of the peep hole by hand. If it wiggles or turns easily, it indicates a loose fitting that requires tightening.
Step 5
Secure the Peep Hole: Carefully turn the inner component clockwise. Some designs tighten by hand, while others require a small flathead or Phillips screwdriver. Avoid overtightening to prevent damage.
Step 6
Confirm Secure Installation: After tightening, verify that the peep hole is snug and does not wobble within its fitting. Reconfirm that your view remains clear and free of obstructions.
Step 7
Perform a Final Functionality Test: Stand back from the door and look through the peep hole one last time to ensure it provides a clear, wide-angle view of the exterior.
Common mistakes
- Overtightening the peep hole, which can strip threads or damage the door.
- Using abrasive materials like rough cloths or strong chemicals to clean the lens.
- Ignoring a cracked or severely scratched peep hole, compromising security.
- Trying to pry out a stuck peep hole with tools, causing further damage to the door.
When to call a professional
- If the peep hole is stuck and cannot be removed or tightened without excessive force.
- If the peep hole is severely damaged, broken, or parts are missing.
- If you suspect the door itself has been damaged or compromised during a peep hole issue.
- When you lack the necessary tools or feel uncomfortable performing the fix yourself.
Want this done properly without the hassle?
Aap DIY try kar sakte hain, lekin agar time nahi ya confidence kam ho, to professional bula lena better hota hai. Galat step se damage ya safety issue ho sakta hai.