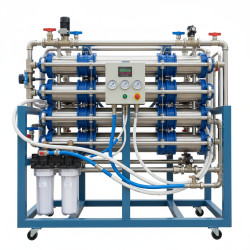
How to Troubleshoot RO Plant Installation Issues at Home
Want this done properly without the hassle?
Aap DIY try kar sakte hain, lekin agar time nahi ya confidence kam ho, to professional bula lena better hota hai. Galat step se damage ya safety issue ho sakta hai.
Starting from
Rs. 1500
Quick answer (read this first)
- Check water supply and pressure.
- Inspect all tubing for kinks or leaks.
- Verify electrical connections and pump operation.
- Ensure filters are correctly installed.
- Bleed air from the system if flow is slow.
Safety first
- Always turn off the main water supply before working.
- Disconnect power to the RO unit before any electrical inspection.
- Use appropriate tools and wear gloves to protect hands.
- Never attempt electrical repairs if you are not qualified.
- Be careful with water spills to avoid slips.
Tools you may need
- Adjustable wrench or spanner.
- Screwdriver set (Phillips and flathead).
- Teflon tape.
- Bucket or towel for spills.
- Utility knife or tubing cutter (optional).
Step-by-step
Step 1
- Confirm Water Supply and Pressure: Ensure the main water inlet valve to your RO plant is fully open. Verify sufficient water pressure; low pressure can affect performance and may indicate a need for a booster pump (professional assessment might be required).
Step 2
- Inspect Tubing for Kinks and Leaks: Carefully follow all water lines from the main inlet to the purified water faucet. Straighten any visible kinks in the tubing. If you find any leaks, gently tighten the associated fittings with an adjustable wrench. Apply Teflon tape if a fitting continues to leak after tightening.
Step 3
- Verify Electrical Connections (Power Off First!): Before touching any electrical parts, unplug the RO unit from the power outlet. Check that the power adapter is securely plugged into both the wall outlet and the RO unit. Ensure there are no loose or visibly damaged wires. Do not attempt to open any electrical components yourself.
Step 4
- Examine Filter Installation: Open the filter housings and carefully remove each filter. Refer to your RO plant’s user manual to confirm that all filters (sediment, carbon block, RO membrane) are correctly seated and in the proper sequence. Reinstall them carefully, ensuring a snug fit.
Step 5
- Bleed Air from the System: If water flow from the purified water faucet is slow or intermittent, open the faucet fully. Allow water to run for several minutes to expel any trapped air within the system. This often improves water flow significantly.
Step 6
- Check for Clogged Drain Line: Locate the wastewater drain line that leads from the RO unit to your sink’s drain pipe. Inspect it for any kinks, blockages, or debris that might be restricting wastewater flow. Clear any obstructions found.
Step 7
- Inspect the Storage Tank Pressure: If purified water isn’t dispensing from the faucet, the storage tank might lack proper pressure. Locate the air valve on the tank (usually under a cap). Gently press the pin; if only water comes out or no air, the tank pressure is too low. Adjusting tank pressure often requires specialized tools and is best left to a professional.
Common mistakes
- Ignoring the user manual for installation steps.
- Overtightening fittings, which can cause cracks.
- Not checking for air in the system after installation.
- Incorrectly installing filters or the RO membrane.
- Assuming electrical issues without checking simple connections.
When to call a professional
- If you detect persistent leaks after tightening connections.
- If the RO pump is running but no water is flowing.
- For electrical faults beyond simple plug checks.
- If the water quality remains poor despite troubleshooting.
- For complex issues like membrane replacement or tank pressurization.
Want this done properly without the hassle?
Aap DIY try kar sakte hain, lekin agar time nahi ya confidence kam ho, to professional bula lena better hota hai. Galat step se damage ya safety issue ho sakta hai.
Starting from
Rs. 1500
100% Money Back Guarantee
If you are not satisfied with the service


