How to do a basic Shower Set Installation safety check and quick fixes
Want this done properly without the hassle?
Aap DIY try kar sakte hain, lekin agar time nahi ya confidence kam ho, to professional bula lena better hota hai. Galat step se damage ya safety issue ho sakta hai.
Quick answer (read this first)
- Always turn off the main water supply and any associated electrical power first.
- Perform a visual inspection for leaks, cracks, or loose components.
- Gently tighten any loose nuts or connections on the shower arm, hose, or faucet.
- Clean the showerhead to resolve issues with low water pressure.
- Apply plumber’s tape to threaded connections for minor, persistent leaks.
- Ensure all wall-mounted parts are securely fastened to prevent detachment.
Safety first
- Always turn off the main water supply to the bathroom or house before starting any work.
- If your shower has an electric water heater, cut off its electricity at the main breaker panel.
- Use the correct tools for each task to prevent stripping screws or damaging fixtures.
- Wear protective gloves and eye protection, especially when cleaning or dealing with old parts.
- Avoid overtightening plastic components, as this can cause them to crack and leak.
- Never attempt complex electrical repairs on a water heater if you are not a qualified professional.
Tools you may need
- Adjustable wrench
- Plumber’s tape (PTFE tape)
- Screwdriver set (Phillips and flathead)
- Pliers
- Cleaning brush or old toothbrush
- Bucket and old cloths
- Flashlight (for inspecting dark areas)
Step-by-step
Step 1
1. Isolate Water and Power: Locate and completely shut off the main water supply valve to your bathroom or house. If your shower includes an electric water heater, also turn off its power at the main breaker to ensure safety.
Step 2
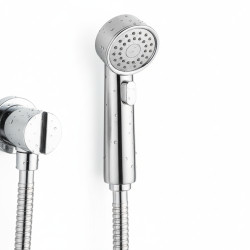
2. Conduct a Thorough Visual Inspection: Carefully examine all visible parts of your shower set: the showerhead, flexible hose (if any), mixing valve/faucet, and wall-mounted brackets. Look for any obvious signs of wear, cracks, corrosion, or existing leaks.
Step 3
3. Test for Active Leaks: Briefly turn the main water supply back on (and power if applicable) and observe all connections, especially pipe joints and the base of the faucet, for any drips or slow leaks. Immediately shut off the water supply again if leaks are detected.
Step 4
4. Diagnose and Fix Low Water Pressure: Unscrew and remove the showerhead. Inspect its nozzles and internal filter for mineral deposits, rust, or debris. Clean any blockages thoroughly using a small brush or pin, then rinse and securely reattach the showerhead.
Step 5
5. Secure Loose Wall Mountings: Check the stability of any wall-mounted components, such as the shower bar, holder, or mixer plate. If loose, gently tighten any visible screws anchoring them to the wall. Do not over-tighten.
Step 6
6. Tighten All Connections: Using an adjustable wrench, gently tighten any loose nuts or connections found on the shower arm, hose fittings, or faucet. Exercise caution to avoid overtightening, which can strip threads or damage components.
Step 7
7. Apply Plumber’s Tape for Persistent Leaks: For minor, persistent leaks at threaded connections, carefully detach the problematic part. Clean the threads thoroughly, then apply 3-5 wraps of plumber’s tape clockwise around the threads before reassembling tightly.
Step 8
8. Final Functional Test: Once all checks and fixes are completed, slowly turn the main water supply back on. Test all functions of the shower set, ensuring no new leaks appear, hot and cold water mix correctly, and the water flow is consistent.
Common mistakes
- Overtightening connections, which can easily strip threads or crack plastic fittings, creating bigger leaks.
- Failing to use plumber’s tape (PTFE tape) on threaded joints, which is crucial for creating a watertight seal.
- Ignoring small, dripping leaks; these can lead to significant water damage, mold growth, and increased water bills over time.
- Attempting electrical repairs on an instant water heater without the necessary expertise or turning off the power.
- Using incorrect or worn-out tools that can damage the finish of fixtures or round off nuts and bolts.
- Not turning off the main water supply, leading to unexpected water gushes and potential flooding.
When to call a professional
- If persistent leaks continue despite attempting all basic fixes and tightening connections.
- When you experience significant and unexplained loss of water pressure that cleaning the showerhead doesn’t resolve.
- If you notice visible damage to the plumbing pipes within the wall or extensive water staining on ceilings/walls.
- For any electrical issues related to an instant water heater, including power trips or lack of heating.
- If the entire shower set, mixer, or main pipework feels unstable or is completely detached from the wall.
- When you are unsure about the cause of a problem, uncomfortable performing a repair, or the issue seems complex.
Want this done properly without the hassle?
Aap DIY try kar sakte hain, lekin agar time nahi ya confidence kam ho, to professional bula lena better hota hai. Galat step se damage ya safety issue ho sakta hai.


