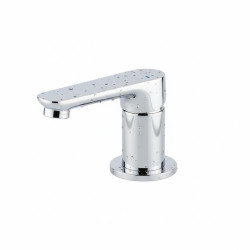
How to do a basic Single Tap Installation safety check and quick fixes
Want this done properly without the hassle?
Aap DIY try kar sakte hain, lekin agar time nahi ya confidence kam ho, to professional bula lena better hota hai. Galat step se damage ya safety issue ho sakta hai.
Quick answer (read this first)
- Visually inspect for leaks at all connection points.
- Confirm all fittings are hand-tightened, then gently snug with a wrench.
- Test water pressure and temperature from the tap.
- Check for any visible signs of corrosion or wear on the tap and pipes.
Safety first
- Always turn off the main water supply before working on any part of the plumbing.
- Wear protective gloves to prevent cuts or scrapes from sharp edges.
- Use the correct tools for each task to avoid damaging pipes, fittings, or the tap itself.
- Never overtighten connections; this is a common cause of cracked pipes and stripped threads.
- If you notice significant water damage or a burst pipe, turn off the main water supply immediately and call a professional.
Tools you may need
- Adjustable Wrench or Pipe Wrench
- Plumber’s Tape (PTFE Tape)
- Bucket or Absorbent Cloths (for catching drips)
- Screwdriver (flathead/Phillips, if needed for handle or aerator removal)
- Soft Brush or Old Toothbrush (for cleaning aerator)
Step-by-step
Step 1
Prepare Work Area and Turn Off Water: Clear the space around the tap and under the sink. Locate the main water supply valve for the tap or house and turn it off completely. Open the tap briefly to drain any residual water.
Step 2
Perform a Thorough Visual Inspection: Carefully examine the tap, its base, and the pipes underneath for any visible signs of wear, corrosion, cracks, or loose components. Look for water stains, rust marks, or mineral deposits which indicate past or current leaks.
Step 3
Check for Loose Connections: Gently feel all nuts and connection points under the sink or basin where the tap connects to the water supply lines. If any feel loose, prepare to tighten them.
Step 4
Gently Tighten All Connections: Using an adjustable wrench, carefully snug up any identified loose nuts or fittings. Turn clockwise until firm, but avoid excessive force as overtightening can cause damage.
Step 5
Test for Leaks and Water Flow: Slowly turn the main water supply back on. Open the tap and observe for any immediate leaks at the connections you just tightened. Check the water flow and temperature regulation.
Step 6
Apply Plumber’s Tape for Persistent Drips: If a minor drip persists from a threaded connection, turn off the water supply again. Carefully disassemble the leaking joint, clean the threads, wrap new plumber’s tape clockwise (2-3 layers) around the male threads, then reassemble and gently tighten. Repeat the water test.
Step 7
Clean or Replace the Aerator for Flow Issues: If water flow from the spout is weak, sputtering, or uneven, carefully unscrew the aerator at the tip of the tap. Clean any accumulated debris or sediment with a soft brush and rinse it thoroughly. Re-attach the aerator firmly.
Step 8
Final Observation for Leaks: With the water supply on and the tap running for a few minutes, carefully check all connections again for any drips, even small ones, especially when the water pressure is stable.
Common mistakes
- Overtightening connections, which can lead to cracked pipes, stripped threads, or damaged fittings.
- Forgetting to turn off the main water supply before starting work, leading to leaks or spills.
- Not using plumber’s tape (PTFE tape) on threaded connections, which can result in minor but persistent leaks.
- Ignoring small drips or slow leaks, allowing them to escalate into larger, more costly water damage over time.
- Using incorrect tools or applying excessive force, which can damage the tap, pipes, or surrounding fixtures.
When to call a professional
- If leaks persist or reappear after you have attempted basic fixes.
- If you encounter burst pipes, significant water damage, or uncontrolled flooding.
- If you are unsure about the source of a leak, the complexity of the piping, or feel uncomfortable performing the repair.
- If the main water supply valve cannot be turned off, is damaged, or is difficult to access.
- If the issue involves the main water line, water heater, or affects the entire building’s water supply.
Want this done properly without the hassle?
Aap DIY try kar sakte hain, lekin agar time nahi ya confidence kam ho, to professional bula lena better hota hai. Galat step se damage ya safety issue ho sakta hai.


