How to Troubleshoot Sub Meter Installation Issues at Home
Want this done properly without the hassle?
Aap DIY try kar sakte hain, lekin agar time nahi ya confidence kam ho, to professional bula lena better hota hai. Galat step se damage ya safety issue ho sakta hai.
Starting from
Rs. 1000
Quick answer (read this first)
- Check for loose connections.
- Verify meter display and readings.
- Inspect wiring for damage.
- Ensure proper load distribution.
Safety first
- Always turn off the main breaker before inspecting wiring.
- Use insulated tools designed for electrical work.
- Never touch bare wires or damaged insulation.
- If unsure about any step, stop immediately and call a certified electrician.
- Wear rubber gloves and safety glasses for protection.
Tools you may need
- Multimeter
- Screwdriver set (insulated preferred)
- Wire stripper/cutter
- Torch/headlamp
- Electrical tape
Step-by-step
Step 1
- Cut Main Power Supply: Locate and switch off the main breaker controlling the sub-meter’s circuit. Always confirm power is off using a voltage tester if available before proceeding.
Step 2
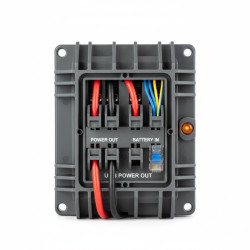
- Examine All Connections: Carefully inspect all wiring terminals at the sub-meter, main distribution board, and any connected junction boxes. Look for loose screws, frayed wires, or signs of corrosion and ensure they are securely fastened.
Step 3
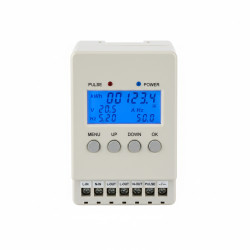
- Assess Sub-Meter Display: Observe the sub-meter’s digital or analog display for any error messages, unusual symbols, a blank screen, or readings inconsistent with your consumption (e.g., meter running when all appliances are off).
Step 4
- Test Power Supply & Output (Use Multimeter): After confirming main power is OFF and taking all safety precautions, use a multimeter to test for voltage at the sub-meter’s input and output terminals (only if you are comfortable and trained to do so). This helps verify if power is reaching the meter and if it is outputting correctly.
Step 5
- Inspect Wiring for Damage: Trace the wiring paths leading to and from the sub-meter. Look for any visible signs of physical damage, cuts, kinks, exposed conductors, or burnt/melted insulation, which can indicate a short circuit or overload.
Step 6
- Check for Overload: Review the appliances and lights connected to the sub-meter circuit. Ensure the total electrical load does not exceed the sub-meter’s rated current capacity. Overloading can trip breakers, damage the meter, or cause inaccurate readings. Try disconnecting non-essential items to see if the issue resolves.
Step 7
- Reset Tripped Breakers: If the sub-meter’s circuit breaker has tripped, keep it off initially. Once all inspections are complete and you’ve addressed any visible faults, carefully reset the breaker. If it trips again immediately, do not force it; this signals a serious underlying electrical fault.
Common mistakes
- Working on electrical systems without turning off the main power.
- Using non-insulated or inappropriate tools for electrical work.
- Ignoring visible signs of damage, such as burnt wires or persistent humming sounds.
- Overloading the sub-meter circuit by connecting too many high-power appliances.
- Attempting complex electrical repairs beyond your skill level or comfort zone.
When to call a professional
- If the meter displays an error code that you cannot understand or resolve.
- When you detect burning smells, smoke, or hear unusual buzzing sounds from the meter or wiring.
- If wiring is severely damaged, burnt, or you find exposed live conductors.
- When your troubleshooting steps do not resolve the issue, and you’re still experiencing problems.
- If you feel uncomfortable, unsure, or lack the necessary tools or expertise for any step.
- For persistent power fluctuations, outages, or recurring circuit breaker trips.
Want this done properly without the hassle?
Aap DIY try kar sakte hain, lekin agar time nahi ya confidence kam ho, to professional bula lena better hota hai. Galat step se damage ya safety issue ho sakta hai.
Starting from
Rs. 1000
100% Money Back Guarantee
If you are not satisfied with the service