How to Troubleshoot, Repair, and Replace a Switchboard Socket at Home
Want this done properly without the hassle?
Aap DIY try kar sakte hain, lekin agar time nahi ya confidence kam ho, to professional bula lena better hota hai. Galat step se damage ya safety issue ho sakta hai.
Quick answer (read this first)
- Always disconnect main power to the affected area or entire house before starting any electrical work.
- Use a non-contact voltage tester to confirm power is completely off at the socket.
- First, check for simple issues like tripped breakers or loose appliance plugs before opening the socket.
- Inspect wiring for loose connections, burn marks, or damage, but only after confirming no power.
- If necessary, replace the faulty socket with a new, compatible one, ensuring correct and secure wiring.
- Test the new socket thoroughly with a low-power appliance before full use.
Safety first
- Turn off the main circuit breaker for the affected area or your entire house. Do not rely on light switches.
- Verify power is off using a reliable non-contact voltage tester before touching any wires or components.
- Wear insulated gloves and use tools with insulated handles to prevent electrical shock.
- Never touch bare wires or metal components when there’s any possibility of power being on.
- Keep children and pets safely away from the work area to prevent accidents.
- If you are uncertain, uncomfortable, or lack the necessary skills, do not attempt the repair; call a professional.
Tools you may need
- Screwdriver set (Philips and flathead)
- Non-contact voltage tester
- Wire strippers (if cutting or re-stripping wires)
- New replacement socket (ensure it matches the type and amperage rating)
- Insulated electrical tape (optional, for reinforcing connections)
Step-by-step
Step 1
Step 1: Initial Safety Check and Power Disconnection. Locate your main circuit breaker and switch off the power to the specific switchboard or the entire house. Use a non-contact voltage tester to confirm there is absolutely no power at the socket you intend to work on.
Step 2
Step 2: Perform External Troubleshooting. Before opening the socket, check for basic issues: ensure the appliance plug is fully inserted, try the appliance in another working socket, and verify no circuit breakers for that area are tripped. Reset any tripped breakers.
Step 3
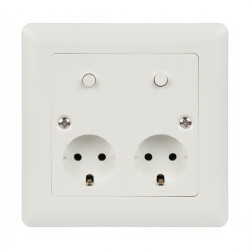
Step 3: Access the Socket. Carefully unscrew and remove the faceplate of the problematic switchboard socket. Gently pull the socket out from its wall box, taking care not to strain the wires.
Step 4
Step 4: Inspect Wiring and Socket for Damage. Visually inspect the socket and its connected wires for any signs of damage. Look for burn marks, discoloration, melted plastic, frayed insulation, or any loose wire connections. Check for foreign objects inside the socket.
Step 5
Step 5: Attempt Minor Repair (if applicable). If you find only loose wire connections and no other damage (like burning or melting), carefully tighten the terminal screws for each wire. If the socket itself shows signs of damage, proceed to replacement.
Step 6
Step 6: Disconnect the Old Socket (if replacing). If a replacement is necessary, loosen the terminal screws and carefully disconnect all wires from the old socket. Crucially, note the position of each wire (typically Live/Phase, Neutral, and Earth/Ground) for correct re-connection.
Step 7
Step 7: Install the New Socket. Connect the corresponding wires to the correct terminals on the new socket (Live to Live, Neutral to Neutral, Earth to Earth). Ensure all connections are tight and secure. Gently push the new socket back into the wall box and screw it firmly into place. Re-attach the faceplate.
Step 8
Step 8: Final Power Up and Testing. Turn the main power back on at the circuit breaker. Carefully test the newly installed or repaired socket using a small, low-power appliance. Listen for unusual buzzing sounds, check for sparks, and ensure proper functionality. If any issues arise, immediately turn off power and re-inspect.
Common mistakes
- Failing to turn off the main power supply before beginning any electrical work, leading to severe shock hazards.
- Not confirming that the power is off using a voltage tester, creating a false sense of security.
- Incorrectly connecting Live, Neutral, and Earth wires, which can cause electrical hazards or appliance damage.
- Leaving loose wire connections, which can lead to arcing, short circuits, overheating, or fire.
- Using incorrect tools, damaged tools, or non-insulated tools for electrical work.
- Ignoring severe signs of damage like extensive charring, melting, or a persistent burning smell, which indicate a serious problem.
When to call a professional
- If the circuit breaker trips repeatedly even after you have performed the repair or replacement.
- If you encounter extensive damage such as severely burnt wires, melted components, or visible sparking.
- If you are unsure about identifying specific wires, making safe connections, or feel uncomfortable at any point.
- If the problem persists, worsens, or recurs after you have carefully followed all troubleshooting steps.
- If you detect any strange smells (like burning plastic), buzzing sounds, or see sparks after turning power back on.
- For any complex wiring issues, problems involving the main electrical panel, or if multiple sockets are affected.
Want this done properly without the hassle?
Aap DIY try kar sakte hain, lekin agar time nahi ya confidence kam ho, to professional bula lena better hota hai. Galat step se damage ya safety issue ho sakta hai.