How to Troubleshoot UPS Installation Issues at Home
Want this done properly without the hassle?
Aap DIY try kar sakte hain, lekin agar time nahi ya confidence kam ho, to professional bula lena better hota hai. Galat step se damage ya safety issue ho sakta hai.
Quick answer (read this first)
- Always turn off and unplug the UPS before inspecting connections.
- Verify the main power supply and all circuit breakers.
- Ensure all UPS, battery, and output cables are securely connected.
- Check for any error codes or indicator lights on the UPS display.
- Confirm correct battery polarity and sufficient initial charge time.
Safety first
- Always disconnect the UPS from the main power supply and batteries before touching any wires or components.
- Wear insulated gloves and use tools with insulated handles to prevent electric shock.
- Avoid touching exposed wires, especially if wet or damaged.
- Never bypass safety features or attempt internal repairs beyond simple checks.
- Keep children and pets away from the work area to prevent accidents.
Tools you may need
- Insulated screwdriver set
- Insulated gloves
- Flashlight
- Multimeter (optional, for advanced voltage checks)
- Your UPS unit’s user manual
Step-by-step
Step 1
Perform initial safety checks: Before troubleshooting, ensure the UPS is completely powered off and unplugged from the main power outlet. Disconnect battery terminals if instructed by your manual.
Step 2
Verify main power supply: Confirm that electricity is reaching your home and the specific circuit breaker connected to the UPS is switched on. Test other outlets in your home to ensure general power availability.
Step 3
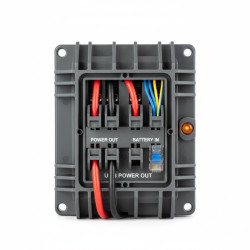
Inspect all cable connections: Carefully check every cable connected to your UPS, including the input power cable, battery cables, and output cables to appliances. Ensure they are all clean, free from damage, and securely plugged into the correct ports. Loose connections are a frequent cause of malfunctions.
Step 4
Confirm battery connections and charge: Ensure battery terminals are clean, free of corrosion, and tightly connected (positive to positive, negative to negative). Allow sufficient initial charging time (usually several hours) as per your UPS manual before expecting full operation.
Step 5
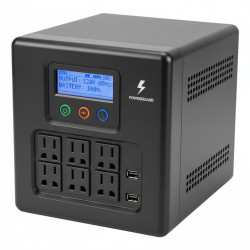
Examine UPS display and indicator lights: Refer to your UPS user manual to interpret any error codes, warning lights, or specific messages displayed on the unit. These indicators are designed to pinpoint the exact nature of the problem.
Step 6
Test for overload: Disconnect all appliances from the UPS output ports. Try turning on the UPS with no load. If it starts, reconnect appliances one by one to identify if a specific device is causing an overload.
Step 7
Reset the UPS unit: Power off the UPS, disconnect it from both the main power and its batteries for at least 5-10 minutes. Then, reconnect everything and restart the UPS. This can often resolve minor software glitches or temporary faults.
Step 8
Check internal/external fuses or circuit breakers: Some UPS models have resettable fuses or small circuit breakers located on the unit itself. Locate these and ensure they are not tripped; reset if necessary.
Common mistakes
- Incorrectly connecting battery terminals (reverse polarity).
- Overloading the UPS by connecting too many high-power appliances.
- Failing to allow adequate initial charging time for new batteries.
- Ignoring the UPS user manual for troubleshooting and error code interpretation.
- Using damaged or undersized wiring for the power or battery connections.
- Attempting repairs without first disconnecting all power sources.
When to call a professional
- If the UPS emits smoke, burning smells, or unusual noises.
- When basic troubleshooting steps do not resolve the issue, or the problem reappears.
- If you are unsure about any electrical connections or feel uncomfortable performing checks.
- For internal component failures, complex wiring issues, or specific battery replacement requirements.
- If the problem seems to involve your home’s main electrical wiring or distribution board.
Want this done properly without the hassle?
Aap DIY try kar sakte hain, lekin agar time nahi ya confidence kam ho, to professional bula lena better hota hai. Galat step se damage ya safety issue ho sakta hai.