How to Troubleshoot UPS Wiring Issues at Home
Want this done properly without the hassle?
Aap DIY try kar sakte hain, lekin agar time nahi ya confidence kam ho, to professional bula lena better hota hai. Galat step se damage ya safety issue ho sakta hai.
Quick answer (read this first)
- Always turn off all power before inspecting.
- Check main input/output wires for loose connections.
- Verify battery terminals are clean and tight.
- Look for any visible damage or burning signs.
- Do not open the UPS unit itself.
Safety first
- Always turn off the main electricity breaker and unplug the UPS before inspecting any wiring.
- Use insulated tools to prevent electric shock and ensure they are in good condition.
- Never touch bare wires or live terminals; assume all wires are live until proven otherwise.
- Work in a dry, well-lit environment; avoid water or dampness at all costs.
- If you smell burning, see smoke, or hear unusual arcing, immediately disconnect power (if safe to do so from a distance) and call a professional. Do not proceed.
Tools you may need
- Screwdriver set (flathead and Phillips)
- Pliers (needle-nose and combination)
- Multimeter (highly recommended for accurate checks)
- Electrical insulation tape
- Wire brush (for battery terminals)
- Torch/flashlight (for inspecting dark areas)
Step-by-step
Step 1
Prioritize Safety & Disconnect Power: Locate your home’s main electrical panel. Switch off the main circuit breaker that powers your UPS or the entire house. Physically unplug the UPS from its wall socket. Confirm there is no power using a non-contact voltage tester if available.
Step 2
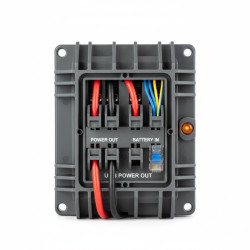
Initial Visual Inspection of External Wires: Carefully examine the UPS power cable (input cable) connected to the wall outlet. Look for any visible cuts, nicks, fraying, or signs of overheating on the cable’s insulation. Check the wall socket itself for any loose connections or damage.
Step 3
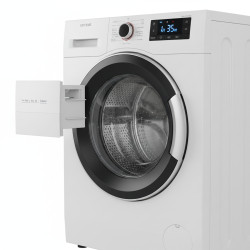
Inspect Battery Connections: Locate the UPS battery compartment or external battery terminals. Visually inspect the battery terminals for corrosion (white or greenish buildup). Ensure the positive (+) and negative (-) terminal connections are clean, tight, and securely fastened. Clean any corrosion gently with a wire brush, ensuring no particles fall into the battery.
Step 4
Examine UPS Output and Appliance Connections: Trace the wiring from the UPS output sockets to your connected appliances or home distribution board. Verify all plugs are fully inserted into the UPS output sockets and are not loose. Inspect the wires for any damage, especially where they bend or pass through tight spaces. Check the power cords of your appliances for any faults.
Step 5
Look for Signs of Overheating or Damage: Systematically scan all accessible wires, plugs, and sockets around the UPS setup. Search for any black soot, melted plastic, burning smells, or discoloration – these are critical indicators of an electrical fault. Do not ignore even minor signs of damage, as they can indicate a serious underlying problem.
Step 6
Tighten Connections and Minor Repairs: Using appropriate insulated screwdrivers, gently tighten any loose screw terminals found on plugs or sockets. If you find minor nicks on insulation (without exposed copper), you can carefully wrap them with electrical insulation tape. Only do this if the copper is not exposed and you are confident it’s a superficial nick. Do NOT attempt to repair significantly damaged cables; replace them.
Step 7
Reconnect and Test Carefully: Once all inspections and minor tightening are complete, ensure all tools are clear of the wiring. Plug the UPS back into the wall socket. Switch on the main circuit breaker for the UPS. Monitor the UPS for unusual noises, smells, or error lights during startup. Test with a low-power appliance first.
Common mistakes
- Forgetting to turn off the main power and unplugging the UPS completely before beginning.
- Assuming the issue is always the UPS itself without checking external wiring and connections.
- Attempting to open the UPS casing or fix internal components without proper electrical training.
- Ignoring subtle warning signs like flickering lights, unusual hums, or minor heat on plugs.
- Using worn-out, non-insulated, or incorrect tools for the job.
- Not cleaning battery terminals thoroughly or re-tightening connections properly.
When to call a professional
- If you are hesitant, lack confidence, or feel uncomfortable at any point during the troubleshooting process.
- When initial checks and minor fixes do not resolve the UPS wiring issue.
- If you encounter burning smells, smoke, sparking, or hear arcing sounds.
- For any internal repairs of the UPS unit or complex re-wiring within your home’s electrical system.
- If you need to install new dedicated wiring for a high-capacity UPS or modify existing circuits.
- When dealing with damaged main supply lines or persistent electrical faults that could pose a a safety hazard.
Want this done properly without the hassle?
Aap DIY try kar sakte hain, lekin agar time nahi ya confidence kam ho, to professional bula lena better hota hai. Galat step se damage ya safety issue ho sakta hai.