
How to Do a Basic Voltage Stabilizer Safety Check & Quick Fixes
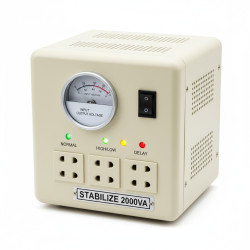
Want this done properly without the hassle?
Aap DIY try kar sakte hain, lekin agar time nahi ya confidence kam ho, to professional bula lena better hota hai. Galat step se damage ya safety issue ho sakta hai.
Quick answer (read this first)
- Always unplug the stabilizer before inspection.
- Perform a visual check for damage, smells, and clear vents.
- Inspect power cords and plugs for fraying or loose connections.
- Gently tighten accessible terminal screws (when unplugged).
- Briefly power on the stabilizer (without appliances) to observe basic function and listen for unusual sounds.
- Measure output voltage with a multimeter (if available) to confirm stability.
Safety first
- Always disconnect the voltage stabilizer from the main power supply before any physical inspection or adjustment.
- Never touch bare wires or damaged electrical components.
- Use only insulated tools if checking connections or terminals.
- Ensure your hands and the surrounding area are completely dry to prevent electrocution.
- Do not attempt internal repairs beyond simple visual checks or tightening accessible, clearly labeled screws.
- Keep children and pets away from the work area during any inspection or maintenance.
Tools you may need
- Insulated screwdriver (flathead and/or Phillips, depending on stabilizer type)
- Multimeter (optional, for precise voltage checks)
- Clean, dry cloth or soft brush (for cleaning vents)
- Flashlight (for detailed visual inspection)
Step-by-step
Step 1
Step 1: Disconnect Power Safely. Unplug the voltage stabilizer from the wall socket and disconnect all appliances connected to it. Allow a few minutes for any residual charge to dissipate.
Step 2
Step 2: Perform an External Visual Inspection. Carefully examine the stabilizer’s casing for any signs of physical damage, such as cracks, burn marks, melted plastic, unusual smells, or signs of pest damage. Look for any loose parts.
Step 3
Step 3: Inspect Power Cords and Plugs. Check the main power cord connecting to the wall socket and all output cables for any fraying, cuts, exposed wires, or loose connections at the plugs. Ensure plugs are not bent or damaged.
Step 4
Step 4: Ensure Clear Ventilation Openings. Examine all air vents on the stabilizer. Use a clean, dry cloth or soft brush to gently clear away any accumulated dust, lint, or obstructions. Proper ventilation is crucial to prevent overheating.
Step 5
Step 5: Check and Tighten Accessible Connections. With the stabilizer UNPLUGGED, gently check if any accessible terminal screws (if present and safe to access, typically on the back or side panels) are loose. Carefully tighten them with an insulated screwdriver if needed.
Step 6
Step 6: Initial Power-On Functionality Test. Plug the stabilizer ONLY (without any appliances connected) back into a wall socket. Turn it on and observe if it powers up normally. Check for any error lights, unusual noises (buzzing, clicking), or burning smells. If issues arise, unplug immediately.
Step 7
Step 7: Verify Output Voltage (Optional). If you have a multimeter and the initial power-on test was normal, measure the output voltage of the stabilizer. Ensure it’s within the expected range, indicating proper voltage regulation. Do this with no appliances connected.
Step 8
Step 8: Reconnect Appliances Gradually. If all checks pass and the stabilizer appears to be functioning correctly, reconnect your appliances one by one. Monitor the stabilizer for any signs of strain, overload warnings, or unusual behavior as each appliance starts up.
Common mistakes
- Ignoring safety precautions like unplugging the unit before inspection.
- Blocking the stabilizer’s ventilation ports, leading to overheating and potential damage.
- Overloading the stabilizer by connecting too many high-power appliances beyond its capacity.
- Using damaged or frayed power cords and plugs, which can pose fire or shock hazards.
- Attempting complex internal repairs or modifications without professional electrical knowledge.
- Ignoring early warning signs such as unusual noises, smells, or persistent error indicators.
When to call a professional
- If the stabilizer shows burn marks, melting plastic, or emits smoke or a strong burning smell.
- If it repeatedly trips the main circuit breaker or blows fuses.
- If the output voltage is consistently incorrect, fluctuates wildly, or shows no output even after basic checks.
- If you hear persistent loud buzzing, sparking, or grinding noises from inside the unit.
- If the stabilizer fails to power on or displays critical error indicators that you cannot resolve.
- If you are unsure about any inspection step, suspect internal electrical issues, or lack the necessary tools/expertise.
Want this done properly without the hassle?
Aap DIY try kar sakte hain, lekin agar time nahi ya confidence kam ho, to professional bula lena better hota hai. Galat step se damage ya safety issue ho sakta hai.





