How to do a basic Wardrobe Assembly 2 Door safety check and quick fixes
Want this done properly without the hassle?
Aap DIY try kar sakte hain, lekin agar time nahi ya confidence kam ho, to professional bula lena better hota hai. Galat step se damage ya safety issue ho sakta hai.
Quick answer (read this first)
- Check for overall wobbling or instability by gently pushing the wardrobe.
- Inspect and tighten all visible screws, bolts, and fittings on the frame and panels.
- Ensure both doors open, close, and align smoothly without snagging or gaps.
- Verify the back panel is securely attached to the main wardrobe frame.
Safety first
- Always work with a helper when repositioning or adjusting the wardrobe to prevent injury.
- Fully empty the wardrobe’s contents before attempting any structural adjustments or repairs.
- Wear protective gloves to shield hands from splinters, sharp edges, or metal burrs.
- Keep all small hardware components and tools out of reach of children and pets.
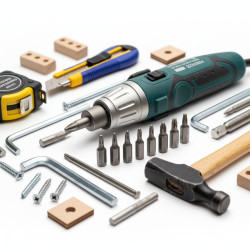
Tools you may need
- Screwdriver set (Philips and flathead for various screw types)
- Small hammer (for nails or tapping loose components)
- Pliers (useful for bending or holding small parts)
- Measuring tape (for checking dimensions and alignment)
- Spirit level (essential for ensuring the wardrobe is perfectly balanced)
Step-by-step
Step 1
Prepare the Wardrobe Safely: First, fully empty the wardrobe of all contents. Ask a helper to steady the unit as you gently push it from different sides to identify any wobbling or instability. Note down any areas that feel loose or unsafe. Do not proceed with fixes if the wardrobe feels like it might tip.
Step 2
Inspect Frame & Panel Fasteners: Thoroughly examine all visible screws, bolts, and cam locks connecting the wardrobe’s main frame, side panels, top, and bottom. Use the appropriate screwdriver to carefully tighten any loose fasteners, turning clockwise until snug. Be cautious not to overtighten, as this can strip the wood or fastener threads.
Step 3
Secure the Back Panel: Check the entire back panel for any gaps or unsecured areas where it meets the main frame. If it’s loose or bowing, use a small hammer to gently tap in existing nails or add new small nails/screws (ensure they are not too long to pierce through to the inside) to re-secure it firmly to the frame. A secure back panel significantly adds to stability.
Step 4
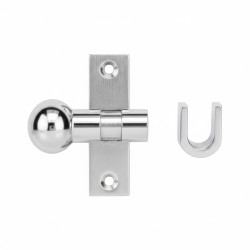
Check and Adjust Door Hinges: Open and close each door slowly, observing the hinges for any creaking, sagging, or jerky movements. Tighten any loose screws on both the hinge plates (attached to the door) and the hinge mounts (attached to the wardrobe frame). If doors are still misaligned, proceed to the next step.
Step 5
Align and Level Wardrobe Doors: With hinges tightened, check if the doors close flush and evenly without gaps or rubbing. For minor adjustments, use a screwdriver to tweak the hinge screws (often there are multiple adjustment screws for horizontal, vertical, and depth alignment) until the doors are perfectly aligned. This usually involves small, incremental turns.
Step 6
Stabilize the Base and Level the Wardrobe: Inspect the wardrobe’s base, feet, or legs for any damage or unevenness. Place a spirit level on the top panel to check if the wardrobe stands perfectly level. If uneven, carefully lift the wardrobe slightly (with a helper) and insert small shims (e.g., folded cardboard or plastic packers) under the lowest feet until the unit is stable and level on all sides.
Step 7
Final Security Check & Reload: Once all adjustments are made, gently push the wardrobe again to confirm stability. Ensure all tools are put away. You can now carefully reload your items, distributing weight evenly, especially on shelves, to maintain the wardrobe’s balance and prevent future instability.
Common mistakes
- Overtightening screws, which can strip the wood threads or damage the wardrobe material, making future repairs difficult.
- Ignoring minor wobbles or loose fittings, allowing them to escalate into bigger structural problems over time.
- Using the incorrect size screwdriver, which can strip screw heads and make them impossible to tighten or remove.
- Neglecting to check the security of the back panel, which is vital for the overall rigidity and stability of the wardrobe.
When to call a professional
- If the wardrobe exhibits significant structural damage, such as large cracks in weight-bearing panels, broken joints, or irreversible warping.
- When you encounter complex issues that cannot be resolved with basic DIY tools or knowledge, or if attempts to fix it worsen the problem.
- If you feel unsafe or uncomfortable performing the necessary repairs yourself, or lack the specialized tools required for a proper fix.
- When the wardrobe repeatedly loses stability or alignment despite your best efforts to fix it, indicating a deeper underlying structural flaw.
Want this done properly without the hassle?
Aap DIY try kar sakte hain, lekin agar time nahi ya confidence kam ho, to professional bula lena better hota hai. Galat step se damage ya safety issue ho sakta hai.