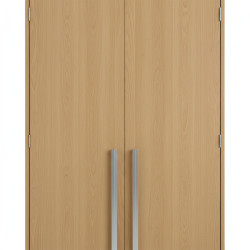
How to Troubleshoot Wardrobe Assembly 2 Door Issues at Home
Want this done properly without the hassle?
Aap DIY try kar sakte hain, lekin agar time nahi ya confidence kam ho, to professional bula lena better hota hai. Galat step se damage ya safety issue ho sakta hai.
Starting from
Rs. 2000
Quick answer (read this first)
- Always refer to your wardrobe’s assembly manual for specific instructions and diagrams.
- Check and tighten all visible screws and fasteners, especially on hinges and handles.
- Use a spirit level to confirm the wardrobe is on a perfectly flat and level surface.
- Systematically adjust door hinges to correct misalignment and ensure smooth operation.
- Never force parts; disassemble and re-check if components do not fit easily.
Safety first
- Work in a well-lit and clear area to prevent accidents.
- Always ensure the wardrobe is stable and cannot tip before attempting any adjustments or moving it.
- Wear safety glasses to protect your eyes from flying debris or dust.
- Use the correct tool size for each screw to prevent stripping screw heads.
- Keep all small parts (screws, pins) out of reach of children and pets.
- For heavy wardrobe sections or during significant adjustments, always ask for assistance to avoid injury.
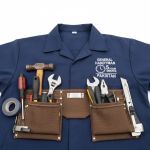
Tools you may need
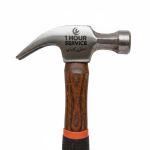
- Screwdriver set (Phillips and flathead, appropriate sizes)
- Spirit level
- Measuring tape
- Allen key (if specific to your wardrobe’s fasteners)
- Pencil for marking adjustments
- Rubber mallet (optional, for gentle tapping)
Step-by-step
Step 1
- Review the Assembly Manual: Before starting any troubleshooting, consult your wardrobe’s original assembly manual. This document is crucial for identifying parts, understanding correct assembly order, and finding specific adjustment instructions.
Step 2
- Ensure a Level Base: Place your wardrobe on a completely flat, level surface. Use a spirit level on the top, front, and sides of the wardrobe to check for any tilt or unevenness. If necessary, use small shims (e.g., cardboard, thin wood pieces) under the base to stabilize and level the unit.
Step 3
- Inspect and Tighten All Fasteners: Methodically go through every screw, bolt, and cam lock connecting the wardrobe structure. Pay close attention to hinges, door handles, connecting panels, and support brackets. Gently tighten any loose fasteners, being careful not to over-tighten and strip the threads or damage the material.
Step 4
- Adjust Misaligned Doors: If doors are not closing properly, rubbing, or appear crooked, locate the hinge adjustment screws. Most hinges have three adjustment screws: one for depth (moving the door closer or further from the frame), one for height (up/down), and one for side-to-side alignment. Make small, incremental adjustments to one screw at a time, testing the door’s movement after each tweak until it hangs plumb and closes smoothly.
Step 5
- Verify Panel Connections and Gaps: Examine all major panels (sides, back, top, bottom) for flush connections and even gaps. If panels are gapping or uneven, slightly loosen the screws connecting them, push the panels firmly into place to close the gaps, and then re-tighten. Ensure any back panels are correctly seated in their designated grooves, if applicable.
Step 6
- Address Sticking Drawers (if applicable): For wardrobes that include internal drawers, ensure the drawer runners are correctly installed and perfectly aligned on both the drawer box and the wardrobe frame. Check for any physical obstructions within the runners. If they still stick after alignment, a dry lubricant or silicone spray can be applied sparingly to the runners, but first confirm no parts are bent or broken.
Step 7
- Test Final Functionality: Once all adjustments have been made, thoroughly test the wardrobe. Open and close both doors and any drawers multiple times to observe for smooth operation, proper closure, and overall stability. Make any final, minor tweaks to hinges or fasteners as needed until you are satisfied with the function.
Common mistakes
- Ignoring the assembly manual, which contains crucial information for correct setup and troubleshooting specific to your wardrobe model.
- Over-tightening screws, which can easily strip threads in particle board or damage components.
- Failing to use a spirit level, leading to an unstable or crooked wardrobe that will cause further issues.
- Forcing parts together when they don’t fit, which can cause irreparable damage to components.
- Using the wrong size screwdriver, leading to stripped screw heads that are difficult to remove.
- Attempting to move a fully assembled wardrobe without assistance, risking personal injury or damage to the unit.
When to call a professional
- If major structural components (e.g., side panels, top/bottom frame) are cracked, bent, or severely damaged.
- If, despite following all troubleshooting steps, the wardrobe remains severely unstable, unsafe, or continues to fall apart.
- When you cannot identify the root cause of the problem, or feel overwhelmed by the task and are unsure how to proceed.
- If you lack the necessary specialized tools, replacement parts, or do not feel confident making the required adjustments yourself.
- If essential parts are missing or incorrect and you cannot obtain replacements from the manufacturer.
- When the wardrobe is collapsing or poses an immediate safety risk that you cannot resolve.
Want this done properly without the hassle?
Aap DIY try kar sakte hain, lekin agar time nahi ya confidence kam ho, to professional bula lena better hota hai. Galat step se damage ya safety issue ho sakta hai.
Starting from
Rs. 2000
100% Money Back Guarantee
If you are not satisfied with the service