Ensure Wardrobe Safety: Assembly Check & Quick Fixes
Want this done properly without the hassle?
Aap DIY try kar sakte hain, lekin agar time nahi ya confidence kam ho, to professional bula lena better hota hai. Galat step se damage ya safety issue ho sakta hai.
Quick answer (read this first)
- Check for wobbling and instability.
- Tighten all visible screws and fasteners.
- Ensure anti-tip devices are properly installed.
- Verify doors and drawers open and close smoothly.
- Distribute weight evenly inside the wardrobe.
Safety first
- Always clear the work area of children and pets.
- Have a helper when moving or repositioning heavy wardrobes.
- Wear gloves if handling parts with potentially sharp edges.
- Do not overload shelves or drawers beyond their capacity.
- Ensure the wardrobe is anchored to the wall, especially if tall.
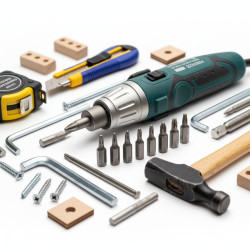
Tools you may need
- Screwdriver set (Phillips and flathead)
- Allen key set (hex keys)
- Spirit level
- Measuring tape
- Small hammer (optional, for gentle taps)
Step-by-step
Step 1
Assess Overall Stability: Gently push the wardrobe from various angles (sides and top) to check for any wobbling. The unit should feel firm and stable with minimal movement.
Step 2
Inspect All Fasteners: Open all doors and drawers. Systematically check every visible screw, bolt, and cam lock to identify any that are loose or protruding.
Step 3
Secure Loose Connections: Using the correct screwdriver or Allen key, carefully tighten any identified loose fasteners. Turn clockwise until snug, but avoid overtightening to prevent stripping.
Step 4
Confirm Anti-Tip Device Installation: For tall wardrobes, verify that the anti-tip kit is securely attached to both the wardrobe and a wall stud. This is crucial for preventing tip-overs.
Step 5
Test Doors and Drawers Functionality: Open and close all doors and drawers multiple times. Ensure they operate smoothly, without sticking, sagging, or grinding. Adjust hinges if doors are misaligned.
Step 6
Optimize Weight Distribution: Reorganize items inside, placing heavier belongings on lower shelves or in bottom drawers. Distribute weight evenly across the entire unit to prevent strain and instability.
Step 7
Check for Structural Damage: Carefully examine the wardrobe panels, hardware, and joints for any visible cracks, chips, broken components, or signs of wear that could compromise its integrity.
Step 8
Level the Wardrobe: Use a spirit level on the top and sides of the wardrobe. If it’s not level, use shims under the feet to stabilize it and prevent wobbling.
Common mistakes
- Ignoring minor wobbles, which can worsen and become dangerous.
- Overtightening screws, leading to stripped threads or damaged wood.
- Not using or improperly installing anti-tip kits, especially for tall wardrobes.
- Unevenly loading shelves, causing stress and potential warping.
- Using incorrect tools that can damage screw heads or fasteners.
When to call a professional
- If the wardrobe is severely wobbly and cannot be stabilized with simple tightening.
- There is major structural damage like large cracks in panels or broken weight-bearing parts.
- Critical hardware is missing and you cannot find suitable replacements.
- Doors or drawers consistently jam or are misaligned despite adjustment attempts.
- You lack the right tools, skills, or confidence to perform the necessary fixes safely.
Want this done properly without the hassle?
Aap DIY try kar sakte hain, lekin agar time nahi ya confidence kam ho, to professional bula lena better hota hai. Galat step se damage ya safety issue ho sakta hai.