How to Prevent Common Wardrobe Assembly Problems
Want this done properly without the hassle?
Aap DIY try kar sakte hain, lekin agar time nahi ya confidence kam ho, to professional bula lena better hota hai. Galat step se damage ya safety issue ho sakta hai.
Quick answer (read this first)
- Read instructions thoroughly before starting.
- Organize all parts and hardware before assembly.
- Use the right tools for each step.
- Do not overtighten screws to prevent damage.
- Assemble on a flat, clean, and spacious surface.
Safety first
- Wear gloves to protect hands from splinters and sharp edges.
- Work in a well-lit area to see all components clearly.
- Keep small parts away from children and pets.
- Lift heavy panels with assistance to prevent personal injury.
- Always secure the assembled wardrobe to a wall to prevent tipping.
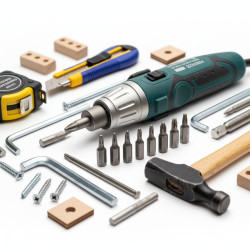
Tools you may need
- Screwdriver set (Philips and flathead)
- Hammer
- Measuring tape
- Spirit level
- Allen wrench (if not provided)
- Soft cloth or blanket (to protect surfaces)
Step-by-step
Step 1
Carefully unpack all components and inspect for any damage or missing parts by cross-referencing with the instruction manual. Contact the retailer if any issues are found.
Step 2
Sort and organize all screws, dowels, cam locks, and other hardware into distinct piles. This prevents confusion and ensures you use the correct part in each step.
Step 3
Read through the entire assembly manual from start to finish before beginning. Understand the sequence and specific requirements for each connection to prevent backtracking.
Step 4
Attach the base and side panels according to the manual’s diagram, ensuring all connections are snug and secure. Be careful not to overtighten screws, which can strip the wood.
Step 5
Carefully slide or nail the back panel into its designated grooves, making sure the wardrobe frame remains square. This step is crucial for stabilizing the entire structure.
Step 6
Install hinges, doors, and drawers last. Adjust them carefully to ensure they are properly aligned, open, and close smoothly without catching or gaps.
Step 7
Once assembled, position the wardrobe in its final location. Use a spirit level to ensure it stands perfectly straight and then secure it to the wall using the provided anti-tip hardware to prevent accidental tipping.
Common mistakes
- Skipping the instruction manual and guessing the assembly order, leading to incorrect installation.
- Mixing up hardware or using the wrong type of screw or dowel in a hole.
- Overtightening screws, which can strip the wood, damage components, or compromise stability.
- Not using a level, resulting in a wobbly or crooked wardrobe that doesn’t sit properly.
- Forcing parts together when they don’t fit, which often results in breakage or irreversible damage.
- Failing to secure the wardrobe to the wall, creating a significant safety hazard, especially in homes with children.
When to call a professional
- If the wardrobe components arrive severely damaged, making proper assembly impossible or unsafe.
- When the assembly instructions are unclear, incomplete, or critical parts are missing, and you cannot resolve it with the retailer.
- If you encounter complex joinery, intricate mechanisms, or parts that seem too difficult to handle yourself.
- When the wardrobe remains unstable, wobbly, or misaligned despite your best assembly attempts and adjustments.
- If you lack the proper tools, sufficient time, or the physical capability for a large or heavy assembly task.
- To ensure professional wall-mounting and maximum stability for tall, heavy, or custom wardrobe units for enhanced safety.
Want this done properly without the hassle?
Aap DIY try kar sakte hain, lekin agar time nahi ya confidence kam ho, to professional bula lena better hota hai. Galat step se damage ya safety issue ho sakta hai.