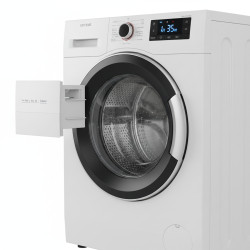
How to Troubleshoot Water Motor Installation Issues at Home

Want this done properly without the hassle?
Aap DIY try kar sakte hain, lekin agar time nahi ya confidence kam ho, to professional bula lena better hota hai. Galat step se damage ya safety issue ho sakta hai.
Starting from
Rs. 2000
Quick answer (read this first)
- Common water motor installation problems include no power, airlocks, clogged pipes, or motor overload.
- Always confirm power supply, check for airlocks, and inspect pipe blockages before attempting advanced repairs or calling a professional.
Safety first
- Always turn off the main power supply to the motor before inspection or repair.
- Wear gloves and eye protection when working with tools or water.
- Do not touch live wires or attempt complex electrical repairs yourself.
- Ensure the area around the motor is dry to prevent electrical hazards and slips.
- If you smell burning, see smoke, or notice excessive heat, immediately disconnect power and call a professional.
Tools you may need
- Screwdriver set (flathead and Phillips)
- Wrench/Pliers
- Multimeter (for basic voltage check, if comfortable)
- Flashlight
- Bucket/cloths for spills
- Work gloves
Step-by-step
Step 1
- Verify Power Connection & Switch: Confirm the water motor’s main ON/OFF switch is in the ‘ON’ position.
Step 2
- Inspect Circuit Breakers/Fuses: Check your home’s main electrical panel for any tripped circuit breakers or blown fuses related to the motor. Reset or replace as necessary.
Step 3
- Test Power Outlet (If Applicable): If comfortable and with a multimeter, verify the power outlet supplying the motor is receiving electricity. Otherwise, try plugging in another device to test the outlet.
Step 4
- Turn Off Power & Visually Inspect Wiring: Crucially, turn off the main power supply to the motor. Carefully open the motor’s terminal box cover (if accessible) and visually inspect all wiring.
Step 5
- Check for Damaged Wiring: Look for loose, frayed, burnt, or damaged wires and connections. If any damaged wiring is found, do NOT proceed and call a professional immediately.
Step 6
- Check Motor Switch Connections: Inspect the wiring at the motor’s ON/OFF switch for similar signs of damage or looseness. If unsure, call a professional.
Step 7
- Listen to Motor Operation (Briefly): With power on, briefly activate the motor and listen carefully. A humming sound without water flow often suggests an airlock or a seized impeller.
Step 8
- Interpret No Sound: If the motor makes no sound at all, it points towards a complete power failure or a severe internal motor malfunction. Re-check power steps.
Step 9
- Address Potential Airlock (Priming): If the motor is humming but not pumping water, it likely has an airlock. Turn off the power to the motor completely.
Step 10
- Prime the Pump: Locate and carefully open the priming cap (usually a small plastic or brass cap) on the top of the pump casing. Slowly fill the pump casing with water until it overflows. This expels trapped air.
Step 11
- Restart After Priming: Securely close the priming cap. Turn the power back on and try starting the motor again. It may take a few seconds for water to flow.
Step 12
- Examine Suction & Discharge Pipes: Visually inspect both the suction (inlet) pipe from the water source and the discharge (outlet) pipe to your home. Look for any visible kinks, tight bends, leaks, or external damage.
Step 13
- Check for Internal Blockages: If possible and safe (with power off and water supply closed), disconnect pipes to check for internal blockages, especially near the pump inlet. Ensure the foot valve (if installed) is not clogged.
Step 14
- Inspect the Impeller (Advanced Step): Only attempt if comfortable and experienced, and with power OFF. Carefully remove the pump casing cover. Visually inspect the impeller for any debris that might be jamming it. Gently clear any obstructions.
Step 15
- Check for Overheating: If the motor has been running, disconnect power and allow it to cool. Cautiously feel the motor casing. An excessively hot casing indicates a potential internal electrical fault, prolonged dry running, or a severe mechanical issue.
Common mistakes
- Ignoring safety precautions before troubleshooting or attempting repairs.
- Attempting electrical repairs without proper knowledge, tools, or safety gear.
- Running the motor dry, which can cause significant damage to the pump components.
- Not checking basic power supply, circuit breakers, or fuses first.
- Over-tightening pipe fittings, which can lead to cracks and leaks.
- Assuming the motor is faulty without checking for airlocks or pipe blockages.
When to call a professional
- If you detect burnt wires, a burning smell, or see smoke from the motor.
- When electrical issues persist despite basic checks, or if the main circuit breaker trips repeatedly.
- If the motor makes grinding noises, is excessively hot, or fails to start at all after troubleshooting.
- For complex mechanical issues like a seized motor, damaged impeller you cannot free, or persistent leaks.
- If you are unsure or uncomfortable performing any troubleshooting or repair step yourself, especially those involving electricity.
Want this done properly without the hassle?
Aap DIY try kar sakte hain, lekin agar time nahi ya confidence kam ho, to professional bula lena better hota hai. Galat step se damage ya safety issue ho sakta hai.
Starting from
Rs. 2000
100% Money Back Guarantee
If you are not satisfied with the service