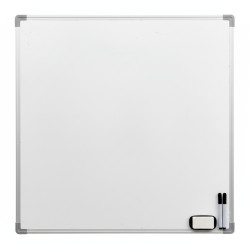
Whiteboard Installation Safety: Checks & Quick Fixes
Want this done properly without the hassle?
Aap DIY try kar sakte hain, lekin agar time nahi ya confidence kam ho, to professional bula lena better hota hai. Galat step se damage ya safety issue ho sakta hai.
Quick answer (read this first)
- Regularly inspect your whiteboard for any wobbling or loose fittings.
- Tighten all screws and mounting anchors if they appear loose.
- Ensure wall plugs and anchors are suitable for your specific wall material.
- Avoid overloading the whiteboard with excessive weight or heavy accessories.
Safety first
- Always wear safety glasses when drilling or working with tools.
- Ensure the whiteboard is level and stable before use to prevent accidental falls.
- Keep children and pets away from the work area during inspection and repair.
- Do not stand directly under a whiteboard while checking its stability.
- Use a sturdy ladder or step stool for height; never use unstable chairs or makeshift platforms.
- Before drilling, always check for hidden electrical wires or water pipes using a stud finder or professional advice.
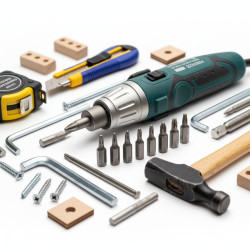
Tools you may need
- Screwdriver set (Philips and flathead)
- Drill machine (if re-anchoring)
- Spirit level
- Measuring tape
- Pencil
- Wall plugs/anchors (appropriate for wall type)
- Hammer (for wall plugs)
- Protective gloves
- Safety glasses
Step-by-step
Step 1
Visual Inspection for Damage: Examine the whiteboard frame, board surface, and all mounting brackets for visible cracks, dents, rust, or other signs of damage.
Step 2
Check Mounting Hardware: Inspect all screws, bolts, and wall anchors to ensure they are fully seated, intact, and not stripped, bent, or corroded.
Step 3
Perform Stability Test: Gently push and pull on the bottom corners of the whiteboard to check for any wobbling, excessive movement, or creaking sounds.
Step 4
Tighten Loose Fasteners: Using the correct screwdriver, carefully tighten any loose screws or bolts on the frame and mounting brackets. Avoid overtightening to prevent stripping.
Step 5
Re-anchor if Necessary: If screws are stripped or existing wall anchors are loose or damaged, remove them. Drill new pilot holes adjacent to the old ones (if possible), insert appropriate new wall plugs, and re-fasten.
Step 6
Verify Level and Alignment: Use a spirit level to confirm the whiteboard is perfectly horizontal and vertically aligned. Adjust mounting points slightly if necessary to ensure even weight distribution.
Step 7
Final Load Test: After any adjustments or fixes, lightly hang a non-fragile item (e.g., a marker tray) on the whiteboard to confirm its stability before regular use.
Common mistakes
- Using incorrect wall plugs for the wall material (e.g., plasterboard plugs for concrete).
- Overtightening screws, which can strip threads, damage the frame, or crack the wall.
- Ignoring minor wobbles, which can worsen over time and lead to a fall.
- Not checking for pipes or wires before drilling new holes.
- Assuming the original installation was flawless without performing regular safety checks.
When to call a professional
- If the wall itself is crumbling, severely damaged, or appears unstable around mounting points.
- If the whiteboard is very large and heavy, requiring specialized heavy-duty anchors and installation expertise.
- If you encounter electrical wires or water pipes behind the wall during drilling, immediately stop and call a professional.
- If you lack the proper tools, experience, or confidence to perform the repair safely and effectively.
- If the whiteboard frame is bent, broken, or structurally compromised beyond simple DIY repair.
- When dealing with complex or fragile wall types like old brickwork, crumbling plaster, or hollow core doors.
Want this done properly without the hassle?
Aap DIY try kar sakte hain, lekin agar time nahi ya confidence kam ho, to professional bula lena better hota hai. Galat step se damage ya safety issue ho sakta hai.