
How to Prevent Common Baby Safety Gate Installation Problems and When to Call a Pro
Want this done properly without the hassle?
Aap DIY try kar sakte hain, lekin agar time nahi ya confidence kam ho, to professional bula lena better hota hai. Galat step se damage ya safety issue ho sakta hai.
Quick answer (read this first)
- Choose the right gate type for your opening and location (pressure-mounted for doorways, hardware-mounted for stairs).
- Measure accurately before purchasing to ensure a proper, secure fit.
- Always follow the specific manufacturer’s instructions precisely for installation.
- Ensure a secure, tight fit with no gaps large enough for a child to pass through or get trapped.
- Regularly check the gate’s stability, hardware, and locking mechanism for wear or looseness.
Safety first
- Always read and fully understand the manufacturer’s installation instructions before starting.
- Use appropriate tools for the task and wear safety glasses, especially when drilling.
- Keep small parts and tools out of reach of children throughout the installation process.
- Never use pressure-mounted gates at the top of stairs; always opt for hardware-mounted gates in this critical location.
- Ensure the gate opens away from stairs if installed at the top of a staircase to prevent accidental falls.
Tools you may need
- Measuring tape
- Pencil
- Drill (for hardware-mounted gates)
- Screwdriver (manual or electric)
- Level
- Stud finder (if mounting into wall studs)
- Safety glasses
Step-by-step
Step 1
Measure and Select Gate Type: Precisely measure your opening’s width. Choose between a pressure-mounted gate for doorways (not top of stairs) or a hardware-mounted gate for stairs or high-traffic areas, ensuring it fits the location and purpose.
Step 2
Unpack and Verify Components: Carefully unpack all parts and cross-reference them with the manufacturer’s list to confirm nothing is missing before starting.
Step 3
Read the Manual Thoroughly: Before beginning, read your specific gate model’s installation manual entirely. Understand all instructions, warnings, and safety guidelines.
Step 4
Mark Mounting Points: Position the gate in the opening. For hardware-mounted gates, use a pencil to mark exact drilling points for brackets. For pressure gates, note the contact points.
Step 5
Install Mounting Hardware or Apply Pressure: For hardware gates, pre-drill marked holes, then securely attach all mounting brackets and hardware according to instructions. For pressure-mounted gates, evenly adjust the tension rods until the gate is firmly wedged and stable within the opening.
Step 6
Test for Stability: After installation, vigorously push and pull the gate from various angles. It must remain completely stable and not wobble or dislodge under force, ensuring it cannot be easily moved by a child.
Step 7
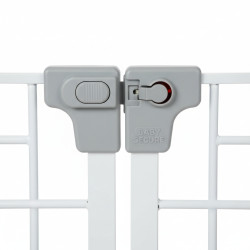
Check Latch and Locking Mechanism: Repeatedly test the gate’s latch and locking mechanism. Ensure it engages securely every time and that a child cannot easily open it.
Step 8
Perform Regular Safety Checks: Periodically inspect all screws, tension rods, and hardware for looseness. Tighten or adjust as needed to maintain the gate’s security and stability over time.
Common mistakes
- Using pressure-mounted gates at the top of stairs; these are designed for doorways only due to significant safety risks.
- Incorrect measurements leading to an ill-fitting gate that is either too loose to be secure or too tight to install properly.
- Skipping the manufacturer’s instructions and attempting a ‘generic’ installation, which can lead to critical errors specific to your gate model.
- Overtightening screws or tension rods, potentially damaging walls, doorframes, or the gate itself.
- Leaving significant gaps (more than 2-3 inches) at the sides or bottom, creating entrapment hazards for children.
- Neglecting to regularly check and tighten wobbly or loose gate fittings, which gradually reduces the gate’s safety and effectiveness.
When to call a professional
- If the gate hardware does not fit your wall or banister due to unusual architectural features or non-standard openings.
- If you encounter challenging materials such as metal railings, concrete walls, or delicate antique woodwork that require specialized tools or techniques.
- If you are unsure about the structural integrity of your wall or banister for drilling and mounting points, especially with older homes.
- If the gate constantly becomes loose, unstable, or difficult to operate despite careful installation and repeated adjustments.
- If you lack the necessary tools, experience, or confidence to install the gate safely and securely yourself, ensuring maximum child protection.
Want this done properly without the hassle?
Aap DIY try kar sakte hain, lekin agar time nahi ya confidence kam ho, to professional bula lena better hota hai. Galat step se damage ya safety issue ho sakta hai.




