DIY Door Hinge Replacement: Step-by-Step Troubleshooting and When to Call a Professional
Want this done properly without the hassle?
Aap DIY try kar sakte hain, lekin agar time nahi ya confidence kam ho, to professional bula lena better hota hai. Galat step se damage ya safety issue ho sakta hai.
Quick answer (read this first)
- Remove hinge pins, replace old hinges with matching new ones, fill stripped screw holes with wood glue and toothpicks, drill pilot holes, and rehang the door carefully.
Safety first
- Wear safety goggles and gloves to protect against splinters and flying debris.
- Never force hinge pins or screws—this can split the wood or damage the frame.
- Always support the door with a helper or sturdy prop before removing hinge pins to prevent sudden drops.
- Keep children and pets away from the work zone to avoid accidents with tools or falling doors.
Tools you may need
- Screwdriver (flathead or Phillips, depending on hinge screws)
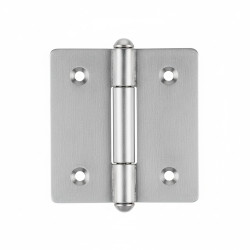
- New door hinges (match original size, material, and weight rating)
- Wood glue and wooden toothpicks or dowels (for stripped screw holes)
- Hammer
- Measuring tape
- Pencil
- Small drill with 1.5mm bit (optional but recommended)
- Clamps or door stoppers (to hold door in place)
Step-by-step
Step 1
Support the door with a helper or a sturdy prop under the bottom edge to prevent it from falling when pins are removed.
Step 2
Tap the hinge pins upward gently with a hammer and screwdriver until they loosen and can be pulled out completely.
Step 3
Remove the old hinges from both the door and frame, then clean away dirt, rust, or old paint from the mounting surfaces.
Step 4
Inspect screw holes—if they’re stripped or enlarged, pack them with toothpicks dipped in wood glue, snap them flush, and let dry for 1 hour.
Step 5
Hold the new hinge in place over the old holes, mark pilot hole locations with a pencil, then drill small guide holes to prevent wood splitting.
Step 6
Secure the new hinges with screws, tightening them fully but without over-torquing—rehang the door by inserting hinge pins and test the swing slowly.
Common mistakes
- Using hinges that are too small or made of thin metal, which can’t support the door’s weight.
- Skipping pilot holes, leading to cracked wood or stripped screws in Pakistani softwood frames.
- Forcing hinge pins back in without checking alignment, which causes the door to rub or stick.
- Leaving stripped holes unfilled, resulting in loose hinges and recurring sagging within weeks.
- Replacing only one hinge when multiple are worn—this creates uneven stress and new problems.
- Not supporting the door properly during removal, risking injury or damage to the door or frame.
When to call a professional
- The door frame is cracked, warped, or has visible rot—this indicates structural damage.
- Multiple hinges have failed repeatedly, even after replacement, suggesting frame or wall issues.
- The door won’t close or latch properly after hinge replacement, indicating misalignment or frame settling.
- You lack the right tools, feel uncertain about handling heavy doors, or the work involves plaster or brick walls.
- You notice signs of termite damage, moisture decay, or wall instability near the door frame.
Want this done properly without the hassle?
Aap DIY try kar sakte hain, lekin agar time nahi ya confidence kam ho, to professional bula lena better hota hai. Galat step se damage ya safety issue ho sakta hai.