
Door Hinge Replacement: Prevent Problems & Know When to Call a Pro
Want this done properly without the hassle?
Aap DIY try kar sakte hain, lekin agar time nahi ya confidence kam ho, to professional bula lena better hota hai. Galat step se damage ya safety issue ho sakta hai.
Quick answer (read this first)
- Always use the correct hinge type and size for your door.
- Pre-drill pilot holes to prevent wood splitting and ensure secure fastening.
- Achieve proper door alignment before tightening all screws.
- Regularly inspect hinges for loose screws to maintain door function.
Safety first
- Always secure the door with wedges or shims to prevent accidental falling.
- Wear sturdy work gloves to protect your hands from splinters and tools.
- Use safety glasses to shield your eyes from debris.
- Ensure your workspace is well-lit and clear of obstructions.
Tools you may need
- Screwdriver set (Phillips and flathead)
- New door hinges
- Pencil
- Measuring tape
- Drill and drill bits
- Wood shims or wedges
- Wood filler/putty (optional)
- Hammer (optional, for stubborn pins)
- Small punch (optional, for hinge pins)
Step-by-step
Step 1
Safety First & Secure Door: Before starting, put on safety glasses and gloves. Securely prop the door open with wedges or shims, ensuring it cannot swing or fall unexpectedly.
Step 2
Remove Old Hinges & Pins: Use a screwdriver to remove screws from both the door and the frame. If pins are present, gently tap them out with a hammer and a small punch before unscrewing.
Step 3
Inspect & Repair Hinge Recesses: Thoroughly clean the old hinge recesses. If screw holes are stripped or enlarged, fill them with wood filler, wood glue, and matchsticks (or toothpicks), allowing to dry completely.
Step 4
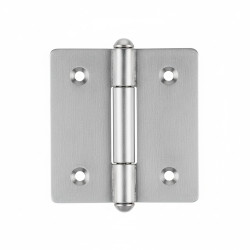
Select & Align New Hinges: Choose new hinges that precisely match the size and type of the old ones. Carefully position the new hinges into the prepared recesses. Use a pencil to mark new screw hole positions if they don’t align perfectly.
Step 5
Pre-drill Pilot Holes: Using a drill bit slightly smaller than the hinge screws, carefully pre-drill pilot holes at each marked position. This critical step prevents wood splitting and ensures a secure, lasting fit.
Step 6
Attach Hinges (Initial Fastening): Fasten one screw per hinge on both the door and the frame. Do not fully tighten yet; this allows for minor adjustments during the alignment phase.
Step 7
Check Alignment & Fully Fasten: Gently close the door to check for proper alignment, smooth movement, and even gaps around the frame. Adjust hinges as needed, then fully tighten all screws securely.
Step 8
Final Test & Lubrication: Open and close the door several times to confirm smooth operation. If any squeaking occurs, apply a silicone-based lubricant to the hinge pins for quiet performance.
Common mistakes
- Selecting the wrong hinge size or type for your door, leading to misalignment and functional issues.
- Failing to pre-drill pilot holes, which can cause wood to split or screws to strip.
- Using an incorrect screwdriver, resulting in stripped screw heads and difficulty in fastening.
- Inadequate door support during hinge removal, risking the door falling and causing injury or damage.
- Over-tightening screws, which can strip the wood or damage new hinges, compromising their lifespan.
When to call a professional
- If the door frame is severely damaged, rotting, or compromised structurally.
- When the door itself is warped, cracked, or too heavy/valuable for a DIY repair attempt.
- Persistent alignment issues or unusual gaps that you cannot resolve after multiple attempts.
- Lack of proper tools, safety equipment, or confidence in your DIY skills for the task.
- Dealing with antique, custom-made, or very expensive doors that require specialized handling and expertise.
Want this done properly without the hassle?
Aap DIY try kar sakte hain, lekin agar time nahi ya confidence kam ho, to professional bula lena better hota hai. Galat step se damage ya safety issue ho sakta hai.




