
How to Prevent Common Door Stopper Installation Problems
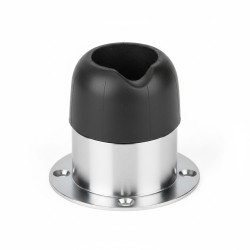
Want this done properly without the hassle?
Aap DIY try kar sakte hain, lekin agar time nahi ya confidence kam ho, to professional bula lena better hota hai. Galat step se damage ya safety issue ho sakta hai.
Quick answer (read this first)
- Choose the right stopper type for your specific door and wall/floor.
- Accurately mark the installation spot to ensure optimal protection.
- Use appropriate tools and fasteners for a secure installation.
- Always test the door stopper’s function immediately after installation.
Safety first
- Wear safety glasses to protect your eyes from flying debris.
- Before drilling, always check for hidden electrical wires or water pipes in the wall.
- Keep children and pets away from the active work area.
- Use the correct drill bit and power tool settings for your specific wall or floor material.
- Ensure a stable footing and maintain a clear, well-lit workspace to prevent trips and falls.
Tools you may need
- Measuring tape
- Pencil
- Drill machine
- Assorted drill bits (suitable for wood, masonry, or tile)
- Screwdriver set (manual or electric)
- Hammer (for wall anchors)
- Spirit level (for accurate placement)
- Your chosen door stopper(s)
- Appropriate screws and wall anchors (matching your door stopper and surface material)
Step-by-step
Step 1
Select the Right Door Stopper: Based on your door’s opening mechanism and the wall/floor material, choose between wall-mounted, floor-mounted, or hinge-pin stoppers. Ensure it’s suitable for the door’s weight and traffic.
Step 2
Determine Optimal Placement: Open the door fully to its maximum safe point. Mark the precise spot on the wall or floor where the door handle would strike, or where the door’s edge needs to be stopped, ensuring maximum protection.
Step 3
Prepare the Surface: Clean the chosen installation area on the wall or floor thoroughly, removing any dust, dirt, or debris for a secure adhesion or drilling surface.
Step 4
Mark Drill Points Accurately: Hold the selected door stopper in its intended position. Use a pencil to precisely mark the locations for the screw holes, checking with a spirit level if needed for floor or wall stoppers.
Step 5
Drill Pilot Holes: Following safety guidelines (and after checking for hidden utilities), use the appropriate drill bit for your wall/floor material to create pilot holes at your marked points. Ensure the depth is sufficient for screws or anchors.
Step 6
Insert Wall Anchors (if applicable): For drywall, plaster, or masonry, gently tap in the appropriate wall anchors into the pilot holes using a hammer until they are flush with the surface.
Step 7
Mount the Door Stopper: Align the door stopper with the prepared pilot holes or anchors. Using a screwdriver or drill, securely fasten the stopper with the provided screws, ensuring it is firmly attached but not overtightened.
Step 8
Test and Adjust: Slowly open and close the door several times to test the stopper’s effectiveness. Verify that it consistently prevents the door from hitting the wall or furniture without causing any new damage or becoming loose.
Common mistakes
- Installing without checking for hidden wires or pipes, risking serious damage or injury.
- Incorrectly positioning the stopper, leading to continued wall or door handle impact.
- Using an unsuitable door stopper type for the door’s weight, traffic, or material.
- Failing to use proper wall anchors for drywall or masonry, resulting in a loose stopper.
- Using the wrong drill bit size, causing pilot holes that are too large or too small.
- Overtightening screws, which can strip threads, crack surfaces, or damage the stopper itself.
When to call a professional
- If you encounter exceptionally hard, delicate, or unfamiliar wall/floor materials.
- If you lack the appropriate power tools or the experience to operate them safely.
- If there’s existing wall, door, or door frame damage that needs repair before installation.
- If you’re unsure about the optimal door stopper type or placement for specific needs.
- For installations involving complex structures or if you require guaranteed, professional-grade results across multiple doors.
Want this done properly without the hassle?
Aap DIY try kar sakte hain, lekin agar time nahi ya confidence kam ho, to professional bula lena better hota hai. Galat step se damage ya safety issue ho sakta hai.




