
DIY Furniture Touch-Ups: Common Mistakes, Solutions, and Expert Guidance
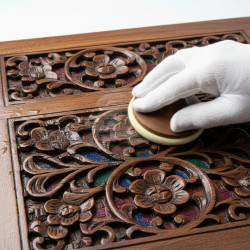
Want this done properly without the hassle?
Aap DIY try kar sakte hain, lekin agar time nahi ya confidence kam ho, to professional bula lena better hota hai. Galat step se damage ya safety issue ho sakta hai.
Quick answer (read this first)
- Clean the damaged area thoroughly before any repair.
- Carefully match the stain or paint color for seamless results.
- Apply touch-up products in thin, even coats to prevent uneven patches.
- Address minor scratches and dings quickly to prevent further damage.
- Know when to call a professional for complex repairs or valuable pieces.
Safety first
- Always work in a well-ventilated area to avoid inhaling fumes from chemicals and stains.
- Wear protective gloves to prevent skin contact with all repair products.
- Keep all furniture repair products and tools securely out of reach of children and pets.
- Test all touch-up products on an inconspicuous area first to ensure color match and compatibility with the existing finish.
- Use a drop cloth, old newspapers, or plastic sheeting to protect floors and surrounding furniture from spills and drips.
Tools you may need
- Furniture touch-up pens or markers (various shades)
- Wood filler or putty (matching wood tone)
- Fine-grit sandpaper (220-400 grit)
- Clean, lint-free cloths
- Protective gloves
- Painter’s tape
- Matching wood stain or paint
- Clear topcoat or lacquer (optional, for added protection)
Step-by-step
Step 1
Assess the damage: Clearly identify if it’s a surface scratch, a deeper ding, a chip, or a discolored area.
Step 2
Clean the surface: Gently wipe the damaged area and its surroundings with a damp cloth to remove dust and grime, then allow it to dry completely.
Step 3
Prepare deeper imperfections: For dings or gouges, carefully apply wood filler, allowing it to dry according to product instructions. Once dry, lightly sand the area smooth with fine-grit sandpaper.
Step 4
Match and test color: Select the closest matching touch-up pen, stain, or paint. Always test on an inconspicuous spot (like the underside of a table) to ensure a perfect color blend.
Step 5
Apply the touch-up: Using a light hand, apply the chosen product in thin, even layers. Build up the color gradually, allowing each coat to dry fully before applying the next.
Step 6
Blend the repair: Once the touch-up is dry, gently blend the edges of the repaired area into the surrounding finish using a soft, clean cloth or a very fine artist’s brush.
Step 7
Apply a protective finish (optional): If desired, apply a clear topcoat or lacquer over the repaired area to seal and protect it, ensuring it matches the sheen of the existing finish.
Step 8
Final inspection and cleanup: Examine the repair from different angles to ensure consistency. Clean up any excess product immediately and properly dispose of all materials.
Common mistakes
- Using the wrong color or shade of touch-up product, resulting in a noticeable patch.
- Applying too much product at once, which can lead to drips, uneven buildup, or a messy finish.
- Failing to properly clean the surface before application, preventing the touch-up from adhering correctly.
- Skipping the sanding step for deeper imperfections, leaving a bumpy or uneven repair.
- Working in poor lighting, making it difficult to accurately match colors and assess the repair.
- Not allowing each layer of product to dry completely, leading to smudging or poor adhesion.
- Neglecting to blend the new finish with the old, creating a stark line between the repair and the original surface.
When to call a professional
- When facing extensive damage such as large cracks, broken structural components, or detached joints.
- For antique, heirloom, or valuable furniture pieces that require specialized restoration techniques to preserve their integrity and value.
- If you are unsure about the original finish type, wood species, or the best repair method for a complex piece.
- When the damage affects the structural integrity of the furniture, making it unsafe or unstable.
- If previous DIY attempts have unintentionally worsened the problem, requiring professional correction.
- When a consistent, professional-grade finish is crucial for the item’s appearance, especially for highly visible furniture.
- For delicate veneers, intricate carvings, or custom finishes that require expert handling.
Want this done properly without the hassle?
Aap DIY try kar sakte hain, lekin agar time nahi ya confidence kam ho, to professional bula lena better hota hai. Galat step se damage ya safety issue ho sakta hai.




