DIY Furniture Touch Up Visit
Want this done properly without the hassle?
Aap DIY try kar sakte hain, lekin agar time nahi ya confidence kam ho, to professional bula lena better hota hai. Galat step se damage ya safety issue ho sakta hai.
Quick answer (read this first)
- Use matching wood filler, gently sand the area, and apply wood polish or clear nail polish to blend minor scratches and chips on wooden furniture.
Safety first
- Wear gloves and a dust mask when sanding or applying fillers to protect skin and lungs from fine particles.
- Work in a well-ventilated room—avoid enclosed spaces where fumes from polish or filler can build up.
- Keep all tools, especially sharp spatulas and sandpaper, out of reach of children and pets.
- Never use water to clean oil-finished wood—it can cause swelling or discoloration.
Tools you may need
- Fine-grit sandpaper (220 grit)
- Wood filler or putty (match your furniture’s color)
- Small paintbrush or cotton swab
- Clean, lint-free cloth
- Wood polish or clear nail polish (for sealing)
- Damp cloth for initial cleaning
Step-by-step
Step 1
Wipe the damaged area with a damp cloth to remove dust and dirt, then let it air-dry completely.
Step 2
Apply a small amount of wood filler into scratches or chips using a spatula or old credit card—press firmly to fill gaps without overloading.
Step 3
Allow the filler to dry for at least 2 hours, or as directed on the product label—do not rush this step.
Step 4
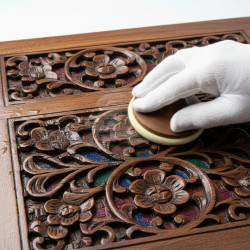
Lightly sand the dried filler with 220-grit sandpaper until it’s perfectly flush with the surrounding wood—sand in the direction of the grain.
Step 5
Wipe away all sanding dust with a clean, dry cloth to ensure a smooth surface for finishing.
Step 6
Apply a thin layer of matching wood polish or a tiny dab of clear nail polish over the repaired area, blending it gently into the surrounding finish.
Common mistakes
- Using too much filler—it creates a raised bump that’s difficult to sand smooth and may look unnatural.
- Skipping sanding after filler dries, leaving a visible ridge or rough texture that catches the eye.
- Using water-based products on oil-finished wood, which can cause blotching, cloudiness, or peeling.
- Rushing the drying time—applying polish before filler is fully cured leads to cracking or lifting.
- Applying polish too thickly, which creates a sticky or glossy patch that doesn’t match the original finish.
- Using household cleaners or alcohol-based wipes before repair—they strip natural oils and worsen the damage.
When to call a professional
- Large cracks or splits in structural parts like legs, arms, or joints that compromise stability.
- Multiple deep gouges covering more than 20% of the surface area.
- Veneer lifting or peeling in large sections—this requires specialized adhesive and clamping.
- Furniture is antique, heirloom, or has intricate carvings or inlays that need expert restoration.
- You’re unsure of the wood type, finish, or original treatment—incorrect products can cause irreversible damage.
Want this done properly without the hassle?
Aap DIY try kar sakte hain, lekin agar time nahi ya confidence kam ho, to professional bula lena better hota hai. Galat step se damage ya safety issue ho sakta hai.