DIY Drawer Channel Replacement: Step-by-Step Troubleshooting and When to Call a Professional
Want this done properly without the hassle?
Aap DIY try kar sakte hain, lekin agar time nahi ya confidence kam ho, to professional bula lena better hota hai. Galat step se damage ya safety issue ho sakta hai.
Quick answer (read this first)
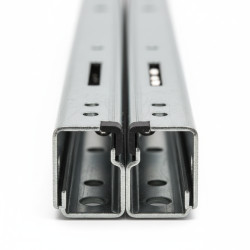
- Replace worn drawer channels with matching metal or plastic ones using basic tools—most repairs take 20 to 40 minutes and require no prior experience.
Safety first
- Wear cut-resistant gloves to protect hands from sharp metal edges on old channels.
- Always wear safety glasses when drilling, prying, or removing fasteners to prevent eye injury.
- Never force a jammed drawer—forcing can crack the wooden frame or snap the new channel.
- Work in a well-lit, ventilated area to avoid inhaling dust from old wood or adhesive residue.
Tools you may need
- Screwdriver (Phillips and flathead)
- Measuring tape
- Pliers or wire cutters
- New drawer channel (match length, width, and material of old one)
- Hammer (for gentle tapping only)
- Fine-grit sandpaper
- Masking tape (to mark alignment)
- Wood filler (optional, for stripped screw holes)
Step-by-step
Step 1
Remove the drawer completely and place it on a soft cloth or towel to avoid scratches.
Step 2
Use a screwdriver to carefully remove all screws holding the old channel on both the drawer side and cabinet frame.
Step 3
Measure the exact length, width, and thickness of the removed channel—take notes or a photo for accuracy.
Step 4
Clean the mounting surfaces thoroughly with sandpaper to remove old glue, rust, or debris for a secure fit.
Step 5
Align the new channel with the screw holes, use masking tape to hold it in place temporarily, then secure with screws—do not overtighten.
Step 6
Reinsert the drawer slowly and slide it in and out 3–5 times to test smoothness; adjust alignment if it catches or rubs.
Common mistakes
- Using a channel that’s even slightly too long or short—causes misalignment and prevents smooth operation.
- Skipping the cleaning step, which leads to poor adhesion and premature failure of the new channel.
- Overtightening screws, which splits the wood or strips the holes, especially in low-quality Pakistani plywood.
- Replacing only one side of the channel—this creates uneven pressure and causes the drawer to tilt or jam.
- Ignoring worn-out screw holes—replacing the channel without repairing stripped holes leads to loose fittings.
- Buying generic channels without matching the roller type (metal vs plastic), resulting in poor glide performance.
When to call a professional
- If the drawer frame is cracked, split, or warped—this requires structural repair.
- If screws no longer hold even after using longer screws or wood filler—indicating deep wood damage.
- If multiple drawers across the home are failing simultaneously—suggesting a systemic issue like moisture damage or poor installation.
- If you cannot identify the channel type or material—incorrect replacements can worsen the problem.
- If the cabinet carcass is loose or the entire unit wobbles—this points to frame or joint failure beyond channel replacement.
Want this done properly without the hassle?
Aap DIY try kar sakte hain, lekin agar time nahi ya confidence kam ho, to professional bula lena better hota hai. Galat step se damage ya safety issue ho sakta hai.