DIY Door Lock Installation: Step-by-Step Troubleshooting and When to Call a Professional
Want this done properly without the hassle?
Aap DIY try kar sakte hain, lekin agar time nahi ya confidence kam ho, to professional bula lena better hota hai. Galat step se damage ya safety issue ho sakta hai.
Quick answer (read this first)
- Measure twice, drill slowly, and stop if wood splits or the lock doesn’t align. Call a professional if the frame is damaged, the mechanism jams, or you lack confidence.
- Always wear safety gear and never force tools—this prevents injury and door damage.
Safety first
- Wear safety goggles and cut-resistant gloves to protect against wood splinters and spinning drill bits.
- Keep children and pets at least 3 feet away from the work area to avoid accidental injury.
- Never force a drill or chisel—this can cause tool failure, wood splitting, or hand injuries.
- Turn off power to nearby outlets if drilling near electrical wiring to prevent shocks.
Tools you may need
- Measuring tape
- Pencil
- Power drill with wood drill bits (sizes matching lock kit)
- Screwdriver set (flathead and Phillips)
- Wood chisel and mallet
- Utility knife
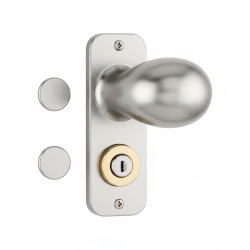
- Door lock installation kit (latch, strike plate, cylinder, handles, screws)
Step-by-step
Step 1
Measure and mark the exact center of the door’s edge for the lock cylinder—use a tape and pencil, double-checking height from the floor (typically 36 inches).
Step 2
Drill the main cylinder hole slowly with the correct bit size from your kit—apply steady pressure and pause to clear wood dust every few seconds.
Step 3
Chisel a clean, shallow recess on the door’s edge to fit the latch plate—test-fit the latch often to ensure it sits flush without gaps.
Step 4
Insert the latch mechanism and secure it with screws—gently press the latch to confirm it moves smoothly and springs back without sticking.
Step 5
Mark the strike plate location on the door frame by closing the door and pressing the latch through—drill a pilot hole, then chisel a recess so the plate sits flush.
Step 6
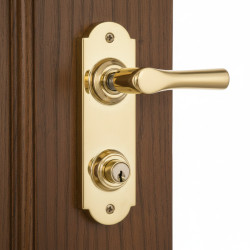
Attach interior and exterior handles, connect the spindle, and test the lock by turning it fully 5 times—check that the latch engages the strike plate cleanly and the door closes without force.
Common mistakes
- Drilling too fast or with the wrong bit size, causing wood to split or the hole to be too wide.
- Skipping the recess chiseling for the latch or strike plate, making the lock protrude and preventing the door from closing.
- Misaligning the latch with the strike plate, leading to the door jamming or not latching at all.
- Over-tightening screws, which strips the wood threads and makes future adjustments impossible.
- Not testing the latch movement before final installation, resulting in a stiff or stuck mechanism.
- Using a dull chisel or hammering too hard, which damages the door edge or creates uneven surfaces.
When to call a professional
- The door frame is cracked, warped, or made of concrete, steel, or solid wood that requires specialized tools.
- The lock mechanism clicks but won’t turn, latch, or retract after installation—even after rechecking alignment.
- You’re working with an antique, reinforced, or hollow-core door that needs expert handling to avoid structural damage.
- You feel uncomfortable using power tools, lack the right equipment, or the door is heavy and hard to stabilize.
- The lock kit doesn’t match your door’s thickness or existing hardware, and you can’t identify a compatible replacement.
Want this done properly without the hassle?
Aap DIY try kar sakte hain, lekin agar time nahi ya confidence kam ho, to professional bula lena better hota hai. Galat step se damage ya safety issue ho sakta hai.