
How to prevent common Kitchen Cabinet Hydraulic Pump problems and when to call a pro
Want this done properly without the hassle?
Aap DIY try kar sakte hain, lekin agar time nahi ya confidence kam ho, to professional bula lena better hota hai. Galat step se damage ya safety issue ho sakta hai.
Quick answer (read this first)
- Regular cleaning prevents dust buildup.
- Lubricate moving parts periodically.
- Check for loose screws and tighten them.
- Avoid overloading cabinet shelves.
- Replace worn-out pumps promptly.
Safety first
- Always wear protective eyewear when working.
- Use the right tools for the job to avoid injury.
- Ensure the cabinet door is supported to prevent it from falling unexpectedly.
- If you’re unsure or uncomfortable at any point, stop and call a professional.
- Never force components, as it can cause damage or personal injury.
Tools you may need
- Screwdriver set (Phillips and flathead)
- Lint-free cloth
- Silicone-based lubricant spray (food-grade if possible)
- Small brush (for cleaning dust)
- Step stool (if needed for high cabinets)
Step-by-step
Step 1
Prepare the cabinet: Empty the cabinet’s contents and securely prop the door open to provide clear access to the hydraulic pump and hinges.
Step 2
Thoroughly clean the pump mechanism: Use a lint-free cloth and a small brush to meticulously remove any accumulated dust, grease, or debris from the hydraulic pump, mounting plates, and surrounding hinge areas.
Step 3
Check and tighten all fasteners: Inspect all visible screws on the hydraulic pump, its mounting brackets, and the cabinet hinges. Use the appropriate screwdriver to gently tighten any screws that appear loose, being careful not to overtighten.
Step 4
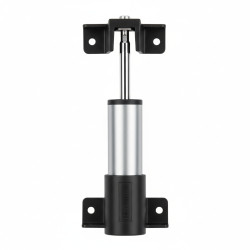
Lubricate moving components: Apply a light, even spray of silicone-based lubricant to the pivot points, the piston rod, and any other moving parts of the hydraulic pump. Wipe away any excess.
Step 5
Test door operation and smooth movement: Gently open and close the cabinet door several times to distribute the lubricant evenly and observe if the closing action is now smooth and consistent.
Step 6
Adjust closing tension (if applicable): If your hydraulic pump features an adjustment screw, make small turns to fine-tune the door’s closing speed. Typically, clockwise slows the close, while counter-clockwise speeds it up.
Step 7
Assess and troubleshoot further: If the door still exhibits issues after cleaning, lubrication, and adjustment, carefully re-evaluate the pump for signs of damage or wear. At this point, consider if the pump needs replacement or professional inspection.
Common mistakes
- Using oil-based lubricants that can attract dust and grime, making the problem worse.
- Over-tightening screws, which can strip threads and damage the cabinet material.
- Ignoring minor issues, allowing them to escalate into more significant and costly problems.
- Trying to repair severely damaged or rusted pumps instead of replacing them entirely.
- Not adequately supporting the cabinet door during maintenance, leading to accidental falls or injuries.
When to call a professional
- If the hydraulic pump is visibly broken, bent, or leaking fluid.
- If the cabinet door still doesn’t close smoothly or stays open after performing all troubleshooting steps.
- If you are not comfortable performing the repair yourself or lack the necessary tools.
- If the issue involves complex cabinet re-alignment or structural damage.
- If the cabinet door is heavy or difficult to handle, posing a safety risk during DIY attempts.
Want this done properly without the hassle?
Aap DIY try kar sakte hain, lekin agar time nahi ya confidence kam ho, to professional bula lena better hota hai. Galat step se damage ya safety issue ho sakta hai.




