
How to Prevent Common Power Plug Installation Problems
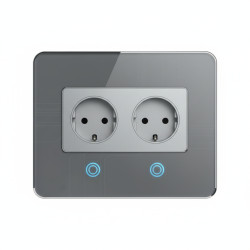
Want this done properly without the hassle?
Aap DIY try kar sakte hain, lekin agar time nahi ya confidence kam ho, to professional bula lena better hota hai. Galat step se damage ya safety issue ho sakta hai.
Quick answer (read this first)
- Always disconnect power at the circuit breaker first.
- Use insulated tools and verify power is off with a tester.
- Identify and correctly connect Live, Neutral, and Earth wires.
- Ensure all wire connections are tight and secure.
- Test the newly installed plug thoroughly before regular use.
Safety first
- ALWAYS turn off the main circuit breaker or fuse for the area.
- Verify power is off with a voltage tester.
- Never touch bare wires if power is on.
- Wear insulated gloves and use insulated tools.
- Do not work with wet hands or in wet conditions.
- Ensure proper grounding for all plug installations.
Tools you may need
- Screwdriver set (flathead and Phillips)
- Wire strippers/cutters
- Voltage tester (non-contact recommended)
- Insulated electrical tape
- Pliers
Step-by-step
Step 1
Step 1: Disconnect Power at the Source. Locate your main electrical panel or fuse box. Identify the circuit breaker (or fuse) controlling the specific outlet you’ll be working on and switch it to the “OFF” position.
Step 2
Step 2: Confirm Power is Off. Use a non-contact voltage tester to verify that there is absolutely no power flowing through the wires in the outlet box. Touch the tester to each wire you intend to handle.
Step 3
Step 3: Carefully Remove the Old Plug (if applicable). Unscrew and gently pull out the existing plug from the wall box. Loosen the terminal screws to disconnect the wires, noting the connection points (Live, Neutral, Earth) and their corresponding wire colors.
Step 4
Step 4: Prepare Wires for New Connection. If wires are damaged, trim a small section. Use wire strippers to carefully remove about 1/2 to 3/4 inch (1.2 to 1.9 cm) of insulation from the end of each wire, exposing clean copper conductors. Twist any frayed strands together neatly.
Step 5
Step 5: Connect the Earth/Ground Wire First. Attach the green/yellow striped Earth wire to the green (or sometimes bare copper) terminal screw on the new plug. Ensure the wire is wrapped clockwise around the screw and tightened securely.
Step 6
Step 6: Connect Neutral and Live Wires. Connect the Neutral wire (typically blue or black in Pakistan) to the silver terminal screw. Then, connect the Live wire (typically brown or red in Pakistan) to the brass terminal screw. Ensure each wire is tightly secured with no exposed copper strands near the insulation.
Step 7
Step 7: Neatly Position Wires and Mount Plug. Carefully fold the connected wires into the wall box, making sure they are not pinched or strained. Align the new plug with the mounting holes and screw it securely into the wall box. Attach the faceplate.
Step 8
Step 8: Restore Power and Test. Return to your electrical panel and switch the circuit breaker back to the “ON” position. Plug in a small, known-working appliance (like a lamp) or use a plug tester to confirm the new plug is functioning correctly and safely.
Common mistakes
- Forgetting to turn off power: Extremely dangerous.
- Incorrect wire connections: Can cause short circuits or appliance damage.
- Loose wire connections: Leads to arcing, overheating, and fire risk.
- Not using the earth/ground wire: Eliminates a crucial safety feature.
- Over-tightening or under-tightening screws: Damages wires or creates poor contact.
- Using incorrect wire gauges: Can lead to overheating.
When to call a professional
- If you are unsure about any step or feel uncomfortable with electrical work.
- If you encounter old, frayed, or damaged wiring that needs replacement.
- If the circuit breaker repeatedly trips after installation.
- If you don’t have the proper tools or safety equipment.
- If the existing wiring system seems complex or outdated.
- Any signs of smoke, burning smell, or sparking.
Want this done properly without the hassle?
Aap DIY try kar sakte hain, lekin agar time nahi ya confidence kam ho, to professional bula lena better hota hai. Galat step se damage ya safety issue ho sakta hai.





