How to Prevent Common AC Capacitor Replacement Problems and When to Call a Pro
Want this done properly without the hassle?
Aap DIY try kar sakte hain, lekin agar time nahi ya confidence kam ho, to professional bula lena better hota hai. Galat step se damage ya safety issue ho sakta hai.
Starting from
Rs. 1500
Quick answer (read this first)
- If your AC isn’t cooling efficiently or won’t start, a faulty capacitor is a common culprit.
- Visually inspect the capacitor for physical damage like bulging, leaking, or rust.
- Always disconnect power at the main breaker before touching your AC unit to prevent electric shock.
- Proper capacitor replacement can quickly restore your AC’s cooling performance.
Safety first
- ALWAYS turn off power to the AC unit at the main electrical panel first.
- Discharge the capacitor safely using an insulated screwdriver or discharge tool.
- Wear insulated gloves and safety glasses for protection.
- Avoid touching capacitor terminals with bare hands, even after power is off.
Tools you may need
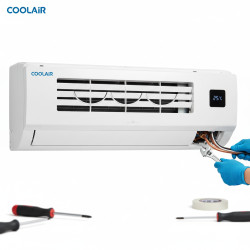
- Screwdrivers (Philips, Flathead)
- Needle-nose pliers
- Multimeter with capacitance testing function
- Insulated capacitor discharge tool (or insulated screwdriver with insulated handle)
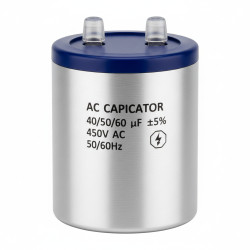
- Replacement AC capacitor (matching MFD and VAC ratings)
Step-by-step
Step 1
- Cut All Power: Locate your AC unit’s dedicated breaker at the main electrical panel and switch it completely OFF. Verify power is off at the unit.
Step 2
- Access Capacitor: Open the outdoor AC unit’s service panel to expose the internal components, including the capacitor.
Step 3
- Discharge Safely: Using an insulated screwdriver or discharge tool, carefully short across the capacitor terminals to dissipate any stored electrical charge. Hold for several seconds.
Step 4
- Document Wiring: Take a clear photo of the capacitor’s wiring configuration, noting which wire connects to the ‘Herm’, ‘Fan’, and ‘Common’ terminals.
Step 5
- Remove Old Capacitor: Carefully disconnect the wires from the old capacitor and then remove the capacitor from its mounting bracket.
Step 6
- Install New Capacitor: Mount the new capacitor securely and reattach the wires precisely according to your photo, ensuring correct terminal connections (Herm, Fan, Common).
Step 7
- Restore Power: Securely close the service panel, then return to your main electrical panel and switch the AC unit’s breaker back ON.
Step 8
- Test AC Unit: Start your AC system and confirm it powers on, runs smoothly, and effectively cools your space.
Common mistakes
- Forgetting to turn off the main power, risking severe electrical shock.
- Failing to discharge the old capacitor properly before handling it.
- Installing a new capacitor with incorrect Microfarad (MFD) or Voltage (VAC) ratings.
- Reversing the wiring connections (e.g., mixing Fan and Herm terminals).
- Touching the capacitor terminals with bare hands before confirming it’s fully discharged.
When to call a professional
- You are uncomfortable or unfamiliar with electrical work and safety procedures.
- The AC unit exhibits multiple complex issues beyond a suspected capacitor fault.
- The capacitor terminals or surrounding wiring show signs of severe corrosion or damage.
- After replacing the capacitor, the AC unit still fails to operate correctly.
- You lack the necessary safety equipment or the correct tools for the job.
Want this done properly without the hassle?
Aap DIY try kar sakte hain, lekin agar time nahi ya confidence kam ho, to professional bula lena better hota hai. Galat step se damage ya safety issue ho sakta hai.
Starting from
Rs. 1500
100% Money Back Guarantee
If you are not satisfied with the service