How to Prevent Common AC Master Service Chemical Problems
Want this done properly without the hassle?
Aap DIY try kar sakte hain, lekin agar time nahi ya confidence kam ho, to professional bula lena better hota hai. Galat step se damage ya safety issue ho sakta hai.
Quick answer (read this first)
- Regularly clean AC air filters for optimal airflow and efficiency.
- Keep outdoor units clear of debris to ensure proper ventilation.
- Promptly address minor issues like reduced cooling or unusual odors to prevent the need for chemical service.
- Ensure all components are free of dust and moisture buildup to inhibit mold and mildew.
Safety first
- Always turn off the AC unit and its main power supply from the breaker before starting any cleaning or maintenance.
- Wear gloves and a mask to protect yourself from dust and cleaning agents.
- Never spray water directly into electrical components of the AC unit.
- Do NOT attempt to use harsh or industrial-grade chemicals; these require professional handling and can damage your unit.
Tools you may need
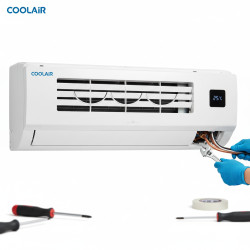
- Screwdriver
- Soft brush or old toothbrush
- Vacuum cleaner with a brush attachment
- Mild soap solution (e.g., dish soap and water)
- Clean cloths or sponge
- Spray bottle (for water/mild soap)
- Gloves
- Mask
Step-by-step
Step 1
Always power off your AC unit at the thermostat and then at the main breaker before starting any work to ensure safety.
Step 2
Carefully unlatch and open the indoor unit’s front panel, then slide out the reusable air filters.
Step 3
Rinse filters thoroughly under running water to remove dust. For stubborn grime, gently wash with a mild soap solution, then rinse and air dry completely.
Step 4
Using a vacuum with a brush attachment or a soft brush, carefully clean the indoor unit’s cooling fins (evaporator coils) and blower fan area to remove dust and light debris. Avoid bending the delicate fins.
Step 5
Inspect the condensate drain pan and line for water buildup or blockages. If accessible, pour a mixture of warm water and a small amount of vinegar into the drain line to help clear minor clogs and inhibit mold growth.
Step 6
Clean the outdoor unit: Ensure it’s free of leaves, grass clippings, and other debris. Gently brush off the condenser coils and wipe down the casing.
Step 7
Wipe down the exterior casing of both indoor and outdoor units with a damp cloth to remove surface dust and dirt.
Step 8
Once the filters are completely dry, slide them back into place, close the indoor unit panel, and restore power to your AC from the main breaker.
Common mistakes
- Forgetting to switch off the main power supply, posing an electrocution risk.
- Using hard brushes or abrasive materials that can damage delicate cooling fins and coils.
- Neglecting to clean the outdoor unit, which significantly impacts efficiency and can lead to compressor strain.
- Trying to perform deep chemical cleaning without proper knowledge, safety equipment, or specialized tools.
- Not allowing filters to dry completely before reinstallation, which can lead to mold and mildew growth inside the unit.
When to call a professional
- If your AC unit is not cooling effectively even after regular cleaning and maintenance.
- If you notice water leaking from the indoor unit, unusual grinding noises, or a persistent burning smell.
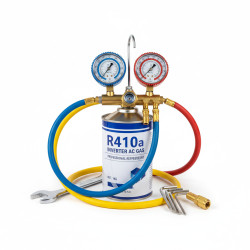
- For any suspected refrigerant leaks, which can be identified by a hissing sound, ice buildup on coils, or poor cooling.
- If there are persistent strange odors that indicate significant mold, mildew, or bacterial buildup requiring a professional chemical wash.
- For any electrical issues, system malfunctions, or if the unit completely stops working.
- If you require a thorough deep chemical wash for coils and other internal components, which is beyond DIY capabilities.
Want this done properly without the hassle?
Aap DIY try kar sakte hain, lekin agar time nahi ya confidence kam ho, to professional bula lena better hota hai. Galat step se damage ya safety issue ho sakta hai.