How to Prevent Common AC Installation Problems and When to Call a Pro
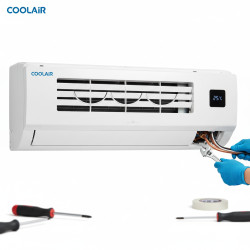
Want this done properly without the hassle?
Aap DIY try kar sakte hain, lekin agar time nahi ya confidence kam ho, to professional bula lena better hota hai. Galat step se damage ya safety issue ho sakta hai.
Quick answer (read this first)
- Proper location is key for efficiency.
- Ensure secure mounting and level installation.
- Check for correct refrigerant line connection.
- Verify electrical connections are secure and safe.
- Always test the unit after installation.
Safety first
- Turn off main power before any electrical work.
- Wear safety gloves and eye protection.
- Never attempt electrical wiring if unsure; call a certified electrician.
- Ensure stable ladder use for height work.
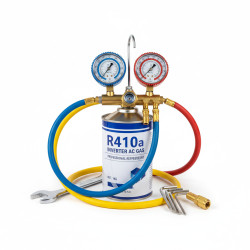
- Do not handle refrigerant without proper training and tools.
Tools you may need
- Measuring tape
- Level
- Drill with masonry bits
- Screwdrivers (Philips, Flathead)
- Wrench set
- Vacuum pump (for refrigerant lines - recommended for pros)
- Multimeter (for electrical checks - recommended for pros)
- Safety gloves and glasses
Step-by-step
Step 1
Select Optimal Location: For outdoor units, choose a shaded spot away from direct sunlight and obstructions to ensure proper airflow. Position indoor units centrally in the room for even air distribution.
Step 2
Secure and Level Mounting: Install robust brackets on a sturdy, level wall for the indoor unit and a firm base for the outdoor unit. Use a spirit level to ensure both units are perfectly horizontal, preventing vibration and drainage issues.
Step 3
Correct Drainage Pipe Installation: Attach the drain pipe with a continuous downward slope, free from kinks or upward bends, to facilitate efficient gravity drainage and prevent water backflow or leaks.
Step 4
Precise Refrigerant Line Connection: Carefully connect the insulated copper refrigerant lines between units. Ensure connections are tight, free of kinks, and properly flared. Use a vacuum pump to remove air and moisture from the lines—a crucial step for efficiency and lifespan.
Step 5
Safe Electrical Wiring: Connect electrical lines according to the manufacturer’s diagram, ensuring proper voltage and secure terminations. Verify the correct circuit breaker size is installed. If unsure, always call a certified electrician to prevent hazards.
Step 6
Thorough Insulation of Lines: Fully insulate all exposed refrigerant lines and electrical cables with appropriate UV-resistant materials. This prevents energy loss, protects components from weather, and improves efficiency.
Step 7
Conduct Pre-Operation Checks: Before powering on, double-check all connections—electrical, refrigerant, and drainage. Ensure all screws are tightened and no tools are left inside units.
Step 8
System Test and Leak Detection: Power on the AC unit and run it in cooling and fan modes. Monitor for proper cooling, airflow, and unusual noises. Use a leak detector or soapy water solution on refrigerant line joints to confirm no gas leaks, tightening any suspect connections.
Common mistakes
- Improper unit sizing for the room leading to inefficiency.
- Poor unit placement reducing cooling performance.
- Incorrect refrigerant line connections causing leaks and gas loss.
- Inadequate insulation on pipes and electrical wires.
- Not using a vacuum pump to properly clear refrigerant lines.
- Unsafe or incorrect electrical wiring leading to hazards.
When to call a professional
- If you are unsure about any electrical wiring or connections.
- If handling refrigerant lines and vacuuming is required (highly recommended for pros).
- If the unit is not cooling or heating effectively after basic checks.
- If you detect refrigerant leaks, strange noises, or persistent issues.
- For any warranty-related installation requirements or complex installations.
Want this done properly without the hassle?
Aap DIY try kar sakte hain, lekin agar time nahi ya confidence kam ho, to professional bula lena better hota hai. Galat step se damage ya safety issue ho sakta hai.