How to Do a Basic AC Installation Safety Check and Quick Fixes
Want this done properly without the hassle?
Aap DIY try kar sakte hain, lekin agar time nahi ya confidence kam ho, to professional bula lena better hota hai. Galat step se damage ya safety issue ho sakta hai.
Quick answer (read this first)
- Always disconnect power to the AC unit before any inspection or fix.
- Inspect power wiring for damage and ensure secure connections at the unit.
- Clear obstructions from the outdoor condenser unit for proper airflow.
- Verify the indoor unit’s drain pipe is clear to prevent water leakage.
- Check for unusual noises or burning smells, indicating potential installation faults.
Safety first
- Always switch off the main circuit breaker for the AC before touching any components.
- Never attempt to open the main AC unit covers or touch internal electrical parts if unsure.
- Wear gloves and protective eyewear when cleaning to avoid dust or debris.
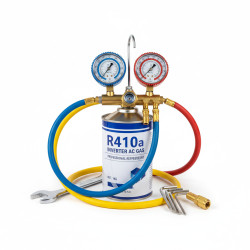
- Do not handle refrigerant lines or attempt to recharge gas yourself.
- If you smell burning, see sparks, or hear loud unusual noises, immediately disconnect power and call a professional.
Tools you may need
- Screwdriver set (Phillips and flathead)
- Gloves
- Cleaning brush or old toothbrush
- Flashlight
- Mild detergent and water (for filter cleaning)
Step-by-step
Step 1
Securely Disconnect AC Power: Locate the dedicated circuit breaker for your AC unit in your home’s main electrical panel. Switch the breaker to the “OFF” position, cutting all power to the unit. Confirm the unit is completely off before touching any components for safety.
Step 2
Inspect Outdoor Unit Mounting and Stability: Examine the outdoor condenser unit’s base or mounting brackets. Ensure it sits firmly on a level, stable surface (e.g., concrete pad) or is securely mounted to the wall. Look for any signs of shifting, tilting, or loose fasteners. Quick Fix: If minor debris is causing slight unevenness, clear it. Do NOT attempt to adjust heavy, unstable units yourself; call a professional.
Step 3
Examine Electrical Connections and Wiring: Carefully check the main power cable entering the outdoor unit and any visible wiring. Look for fraying, cuts, exposed copper, or loose connections at terminal blocks or junction boxes. Quick Fix: For minor insulation damage on the outer sheath, securely wrap with electrical tape. If actual wires are exposed, connections are visibly loose, or you see burn marks, immediately call a professional.
Step 4
Assess Refrigerant Line Insulation Integrity: Inspect the insulated copper refrigerant lines connecting the indoor and outdoor units. Look for tears, cracks, or missing sections of the foam insulation that can lead to energy loss and condensation. Quick Fix: For small areas of damaged insulation, wrap them tightly and completely with UV-resistant electrical tape. Larger sections or damaged lines require professional repair.
Step 5
Verify Condensate Drain Pipe Clearance: Locate the AC’s condensate drain pipe, typically a PVC pipe extending from the indoor unit to the outside. Ensure it’s properly sloped and free from any visible blockages that could cause water backup and leaks. Quick Fix: Gently clear any leaves, dirt, or debris from the drain pipe’s exit point. If the pipe is visibly clogged further inside or no water drips when the AC runs, professional cleaning may be needed.
Step 6
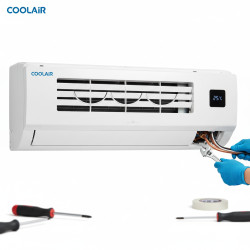
Check Indoor Unit Mounting and Air Gaps: For the indoor unit, visually inspect its mounting on the wall. Ensure it is securely fastened and level. Look for any significant gaps between the unit and the wall, which could indicate improper installation or lead to air leakage. Quick Fix: Small gaps can sometimes be sealed with weatherstripping, but large gaps or loose mounting points require a professional to re-secure the unit.
Step 7
Reconnect Power and Observe Operation: After completing all checks and minor fixes, switch the AC circuit breaker back to the “ON” position. Turn on your AC unit and listen for any unusual sounds or vibrations that might indicate an installation issue. Confirm the unit is cooling effectively and that water is consistently dripping from the drain pipe.
Common mistakes
- Forgetting to disconnect power before starting work.
- Trying to fix complex electrical or refrigerant issues without professional knowledge.
- Using excessive force when cleaning or inspecting, potentially damaging components.
- Ignoring signs like strange smells, loud noises, or complete cooling failure.
- Not allowing filters to dry completely before reinstallation, which can cause mold.
When to call a professional
- If you detect a gas leak or smell a burning odor.
- When the unit is making loud grinding, squealing, or rattling noises.
- If the AC is not cooling at all, or only blowing warm air.
- When circuit breakers trip frequently after turning on the AC.
- If there are visible refrigerant leaks (oily residue) on the copper lines.
- For any electrical issues beyond a simple visual check of the power cord.
Want this done properly without the hassle?
Aap DIY try kar sakte hain, lekin agar time nahi ya confidence kam ho, to professional bula lena better hota hai. Galat step se damage ya safety issue ho sakta hai.