
DIY Bathtub Installation: Step-by-Step Troubleshooting and When to Call a Professional
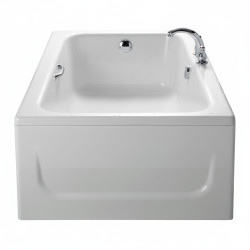
Want this done properly without the hassle?
Aap DIY try kar sakte hain, lekin agar time nahi ya confidence kam ho, to professional bula lena better hota hai. Galat step se damage ya safety issue ho sakta hai.
Starting from
Rs. 3500
Quick answer (read this first)
- Measure your space accurately before buying a tub.
- Ensure your bathroom floor can support the tub’s weight when full.
- Always test for leaks immediately after installation.
- Use proper waterproof sealants for all connections.
- Level the bathtub thoroughly for stable and comfortable use.
Safety first
- Wear protective gloves and eyewear to prevent injury.
- Turn off the main water supply before starting any plumbing work.
- Lift heavy bathtubs with a helper to avoid back strain.
- Ensure good ventilation if using sealants or adhesives.
- Be cautious with sharp tools and edges.
Tools you may need
- Measuring tape
- Level
- Adjustable wrench
- Pipe wrench
- Screwdriver set
- Drill
- Caulking gun and waterproof silicone caulk
- Drain assembly kit
- Plumber’s putty or thread sealant
- Utility knife
Step-by-step
Step 1
- Prepare the Installation Area: Clear the bathroom of old fixtures. Ensure the floor is clean, level, structurally sound, and capable of supporting the tub’s weight when full.
Step 2
- Dry-Fit the Bathtub: Place the bathtub in its intended position without permanent connections. Verify dimensions, alignment with existing drain and water supply lines, and overall fit in the space.
Step 3
- Assemble the Drain: Attach the drain and overflow assembly to the bathtub following the manufacturer’s instructions. Use plumber’s putty or thread sealant for all connections to ensure a watertight seal.
Step 4
- Connect to Drainage: Carefully set the bathtub into its final position. Connect the tub’s drain assembly to the existing floor drain or trap, securing all connections tightly with appropriate fittings.
Step 5
- Connect Water Supply: Attach the hot and cold water supply lines to the bathtub faucet fixtures. Use appropriate fittings and thread sealant on threads to prevent leaks.
Step 6
- Level and Secure the Tub: Use a level to ensure the bathtub is perfectly horizontal from all angles. Shim underneath the tub’s feet or rim if necessary, then secure the tub to adjacent wall studs using screws or clips as recommended by the manufacturer.
Step 7
- Apply Waterproof Caulk: Once the tub is secure, apply a continuous, even bead of waterproof silicone caulk along all edges where the bathtub meets the wall, floor, or any surrounding surfaces. This prevents water penetration.
Step 8
- Initial Leak Test: Turn the main water supply back on slowly. Thoroughly inspect all water supply connections, the drain, and overflow for any signs of leaks. Tighten fittings or re-seal areas immediately if leaks are detected.
Step 9
- Final Drainage Test: Partially fill the bathtub with water, then drain it. Observe the drainage rate and carefully check for any new leaks around the drain and overflow. Confirm there are no blockages and proper water flow.
Common mistakes
- Failing to measure accurately, leading to a tub that doesn’t fit.
- Not properly sealing all drain and water supply connections, causing leaks.
- Skipping the leveling step, resulting in an unstable or uncomfortable tub.
- Using non-waterproof caulk or applying it poorly, leading to water damage.
- Damaging existing plumbing during removal or installation.
- Not testing for leaks thoroughly before finishing the installation.
When to call a professional
- If you encounter persistent leaks after multiple troubleshooting attempts.
- When significant plumbing rerouting or modifications are required.
- If the subfloor or walls show signs of severe water damage or structural issues.
- If you are unsure about local building codes and regulations for plumbing.
- If the bathtub needs to be installed in a complex or unusually small space.
- When dealing with unforeseen complications that are beyond your DIY skill level.
Want this done properly without the hassle?
Aap DIY try kar sakte hain, lekin agar time nahi ya confidence kam ho, to professional bula lena better hota hai. Galat step se damage ya safety issue ho sakta hai.
Starting from
Rs. 3500
100% Money Back Guarantee
If you are not satisfied with the service




