
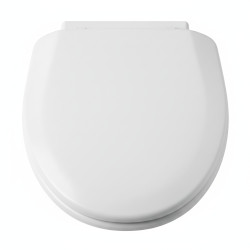
How to Replace Your Commode Seat Cover Yourself
Want this done properly without the hassle?
Aap DIY try kar sakte hain, lekin agar time nahi ya confidence kam ho, to professional bula lena better hota hai. Galat step se damage ya safety issue ho sakta hai.
Quick answer (read this first)
- Most commode seat covers are replaced by unscrewing two bolts located at the back.
- Carefully measure your old seat or commode before purchasing a new one to ensure correct size and shape (round or elongated).
- Thoroughly clean the commode rim and bolt area before installing the new seat for optimal hygiene.
- The entire replacement process typically takes less than 30 minutes.
Safety first
- Wear protective gloves throughout the process for hygiene.
- Exercise caution when using tools to avoid damaging the commode ceramic or stripping bolts.
- Avoid overtightening the new bolts, as this can crack the commode bowl or the new seat.
- Ensure good ventilation if using strong disinfectants during cleaning.
Tools you may need
- New commode seat cover (matching size and shape)
- Screwdriver (flathead or Philips, depending on bolt type)
- Adjustable wrench or pliers (for stubborn bolts)
- Measuring tape (to confirm seat size)
- Cleaning supplies (disinfectant spray, cloth/sponge)
- Small bucket or old towel (to catch any drips)
Step-by-step
Step 1
1. Gather All Tools and Supplies: Collect your new commode seat cover, screwdriver, wrench/pliers, measuring tape, and cleaning supplies before you begin.
Step 2
2. Identify Your Commode Seat Type: Before purchasing, measure the length from the bolt holes to the front rim of the commode and the width at the widest point. Most commodes are either ‘round’ (approximately 16.5 inches) or ‘elongated’ (approximately 18.5 inches).
Step 3
3. Locate and Access the Hinge Bolts: Look for plastic caps at the back of the commode seat, near the tank. Flip these caps open to reveal the bolts securing the seat.
Step 4
4. Remove the Old Commode Seat: Use a screwdriver or wrench to loosen the nuts under the commode (often plastic or metal). Unscrew and remove the bolts, then carefully lift off the old seat and its hinges. Dispose of the old seat hygienically.
Step 5
5. Clean the Commode Rim and Bolt Area: With the old seat removed, thoroughly clean the entire commode rim, especially around the bolt holes, using disinfectant. This step is crucial for hygiene and preventing odors.
Step 6
6. Position the New Seat: Place the new commode seat onto the commode, aligning the new hinge posts with the bolt holes. Ensure the seat is centered and fits properly on the rim.
Step 7
7. Insert and Hand-Tighten New Bolts: Push the new bolts through the hinge posts and bolt holes. From underneath the commode, attach the washers (if provided) and screw on the nuts by hand until they are snug.
Step 8
8. Adjust and Finalize Tightness: Gently tighten the nuts with your screwdriver or wrench. Do not overtighten; stop once the seat is secure and doesn’t wiggle. Over-tightening can crack the ceramic commode bowl.
Step 9
9. Test for Stability and Close Caps: Gently push and pull on the new seat to ensure it is firmly in place. Once satisfied, close the hinge caps (if applicable) for a finished look.
Common mistakes
- Purchasing the incorrect size or shape of commode seat cover, leading to an ill-fitting or unstable seat.
- Overtightening the bolts, which can cause severe cracks in the ceramic commode bowl or the new seat itself.
- Neglecting to thoroughly clean the commode rim before installing the new seat, which can trap dirt and odors.
- Losing small but essential parts like washers, nuts, or hinge caps during the removal or installation process.
- Using inappropriate tools, such as pliers on plastic nuts, which can strip them and make removal difficult.
When to call a professional
- If the old bolts are severely rusted, corroded, or seized, making them impossible to remove with standard tools.
- If you accidentally crack or damage the ceramic commode bowl during the replacement process.
- If you notice any leaks from the commode base, tank, or water supply lines while working on it.
- If the commode seat mechanism is complex or integrated into the commode in a non-standard way.
- If you feel uncomfortable or unsure at any point about proceeding with the replacement yourself.
Want this done properly without the hassle?
Aap DIY try kar sakte hain, lekin agar time nahi ya confidence kam ho, to professional bula lena better hota hai. Galat step se damage ya safety issue ho sakta hai.




