
DIY Gas Pipe Wiring: Step-by-Step Troubleshooting and When to Call a Professional
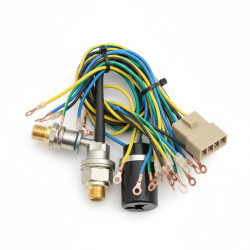
Want this done properly without the hassle?
Aap DIY try kar sakte hain, lekin agar time nahi ya confidence kam ho, to professional bula lena better hota hai. Galat step se damage ya safety issue ho sakta hai.
Quick answer (read this first)
- Use soapy water to check for leaks, tighten fittings with pipe thread tape, and replace damaged sections — but turn off the gas and call a professional immediately if you smell gas or hear hissing.
Safety first
- Never use open flames, lighters, or matches to detect gas leaks.
- Always turn off the main gas valve before starting any repair work.
- Open windows and doors to ensure full ventilation — no smoking, electrical switches, or phones near the work area.
- Wear protective gloves and safety goggles to shield against sharp edges and gas exposure.
- If you detect a strong gas odor, evacuate immediately and do not re-enter until a professional confirms safety.
Tools you may need
- Adjustable wrench
- Gas-rated pipe thread tape (PTFE)
- Soapy water in a spray bottle
- Clean, dry cloth
- Gas pipe cutter (for replacing sections)
- Measuring tape (to confirm pipe length)
Step-by-step
Step 1
Turn off the main gas supply valve to stop all gas flow before beginning any work.
Step 2
Mix dish soap with water in a spray bottle and apply it generously to all joints, connections, and valves.
Step 3
Look for bubbling or hissing — visible bubbles indicate a gas leak at that point.
Step 4
If a leak is found, loosen the fitting, remove old tape, wrap new gas-rated thread tape clockwise around the threads 3–5 times, then retighten firmly by hand before using the wrench.
Step 5
Replace any cracked, rusted, or corroded pipe sections with approved gas-grade piping using a pipe cutter; ensure new fittings are compatible and sealed properly.
Step 6
After repairs, slowly turn the gas valve back on, then re-spray all connections with soapy water to confirm no new leaks appear.
Step 7
Light the gas appliance (stove or heater) and observe the flame — a steady blue flame is normal; a yellow or flickering flame means ventilation or internal issues remain.
Common mistakes
- Using standard Teflon tape instead of gas-rated pipe thread tape, which can degrade and cause leaks.
- Over-tightening fittings, which can strip threads or crack fittings, creating new leaks.
- Ignoring faint hissing sounds or mild gas odors, assuming they’re not serious.
- Using duct tape, glue, or makeshift sealants on gas pipes — these are unsafe and illegal.
- Skipping the post-repair leak test, leaving hidden dangers undetected.
- Working without turning off the main gas valve, risking uncontrolled gas release.
When to call a professional
- You smell strong gas even after turning off the main valve and ventilating the area.
- The leak is hidden behind walls, under floors, or inside ceilings.
- Pipes show extensive rust, corrosion, or damage beyond simple section replacement.
- The gas appliance won’t light, or the flame remains yellow, orange, or unstable after repairs.
- You are uncertain about any step, material, or safety procedure — when in doubt, call a licensed professional.
Want this done properly without the hassle?
Aap DIY try kar sakte hain, lekin agar time nahi ya confidence kam ho, to professional bula lena better hota hai. Galat step se damage ya safety issue ho sakta hai.




