
DIY Instant Geyser Installation: Step-by-Step Troubleshooting and When to Call a Professional
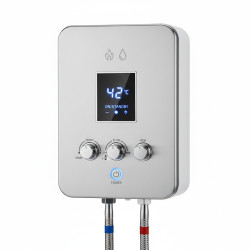
Want this done properly without the hassle?
Aap DIY try kar sakte hain, lekin agar time nahi ya confidence kam ho, to professional bula lena better hota hai. Galat step se damage ya safety issue ho sakta hai.
Quick answer (read this first)
- Turn off power and water before starting. Use ISI-marked parts and Teflon tape on threads. Call a professional if there’s no hot water, sparks, or wiring issues.
Safety first
- Always shut off the main water supply and electrical circuit before beginning any work.
- Never handle electrical components with wet hands or while standing on a damp surface.
- Use only ISI-certified geysers and approved PVC or copper pipes to prevent leaks and electrocution.
- Do not attempt to rewire or modify the geyser’s electrical system — only a licensed electrician should touch live circuits.
- Ensure the geyser is mounted on a load-bearing wall to avoid falling hazards.
- Never bypass the earth wire or use a two-pin plug — grounding is mandatory for safety in Pakistan’s electrical grid.
Tools you may need
- Adjustable wrench
- Teflon tape
- Pipe cutter or hacksaw
- Screwdriver set (flathead and Phillips)
- Bucket and absorbent towels
- Plumbing sealant (for non-threaded joints, if needed)
- Voltage tester (recommended for checking live circuits)
Step-by-step
Step 1
Turn off the main water valve and switch off the circuit breaker supplying power to the installation area.
Step 2
Remove the old geyser by disconnecting the inlet and outlet pipes using an adjustable wrench, then carefully detach any electrical wires.
Step 3
Wrap Teflon tape clockwise around all threaded pipe ends — use 3 to 5 layers to ensure a watertight seal.
Step 4
Mount the new geyser using the provided brackets and wall screws, ensuring it is level and securely fixed to a solid surface.
Step 5
Connect the cold water inlet to the left port and hot water outlet to the right port; tighten all fittings by hand first, then gently with a wrench.
Step 6
Open the water supply slowly and check all connections for leaks — if any are found, turn off water and retighten or re-tape.
Step 7
Once no leaks are detected, restore power and switch on the geyser; wait 2–3 minutes for water to heat, then test temperature and adjust dial as needed.
Common mistakes
- Skipping Teflon tape, leading to slow leaks that cause water damage over time.
- Reversing hot and cold water pipes, resulting in cold water coming out of the hot tap.
- Over-tightening fittings, which can crack plastic nipples or strip brass threads in Pakistani plumbing systems.
- Installing a 220V geyser on a 110V circuit — common in older homes — causing underperformance or failure.
- Neglecting the earth wire connection, which risks fatal electric shock during faults.
- Failing to check water pressure before installation — high pressure can burst pipes, low pressure prevents proper heating.
When to call a professional
- If the geyser doesn’t heat water after confirming correct wiring, water flow, and power supply.
- If you smell burning plastic, see sparks, or hear buzzing from the unit or wiring.
- If water pressure is inconsistent, too high, or too low and you lack a pressure regulator to adjust it safely.
- If your home has old, ungrounded wiring, no MCB, or no RCCB — these are unsafe for instant geysers.
- If you’re uncertain about pipe alignment, electrical connections, or wall mounting stability.
- If water leaks persist after re-tightening and re-taping all joints — this may indicate internal damage or incompatible fittings.
Want this done properly without the hassle?
Aap DIY try kar sakte hain, lekin agar time nahi ya confidence kam ho, to professional bula lena better hota hai. Galat step se damage ya safety issue ho sakta hai.




