
DIY Kitchen Tile Grouting: Step-by-Step Troubleshooting and When to Call a Professional
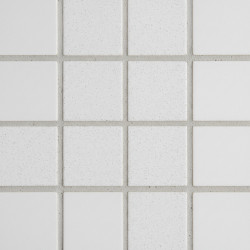
Want this done properly without the hassle?
Aap DIY try kar sakte hain, lekin agar time nahi ya confidence kam ho, to professional bula lena better hota hai. Galat step se damage ya safety issue ho sakta hai.
Quick answer (read this first)
- Mix grout to a thick peanut butter consistency, apply with a float, wipe excess with a damp sponge, let cure 24 hours, and seal for moisture protection.
- Call a professional if tiles are loose, water leaks continue, mold returns, or more than 30% of grout needs replacing.
Safety first
- Wear rubber gloves and safety glasses to protect skin and eyes from grout dust and chemicals.
- Work in a well-ventilated kitchen—avoid breathing in fine grout particles.
- Keep children and pets away from wet grout, tools, and open buckets to prevent slips or ingestion.
- Do not mix or apply grout in damp or rainy conditions—this can cause mold and poor curing.
- Never use metal tools to remove grout near plumbing pipes to avoid accidental damage.
Tools you may need
- Sanded grout (for joints wider than 1/8 inch) or unsanded grout (for narrow joints)
- Grout float
- Clean bucket and sponge
- Rubber gloves
- Safety glasses
- Old toothbrush or stiff nylon grout brush
- Microfiber cloths or paper towels
- Measuring cup for precise water mixing
Step-by-step
Step 1
Remove all loose, cracked, or dirty grout using a grout saw or utility knife—clean joints thoroughly with a brush and dry cloth.
Step 2
Mix grout powder with clean water slowly, following package ratios—aim for a thick, spreadable consistency like peanut butter.
Step 3
Apply grout diagonally across tile joints using the grout float, pressing firmly to force it deep into all gaps.
Step 4
Wait 15–20 minutes, then wipe excess grout with a damp sponge using circular motions—rinse the sponge frequently in clean water.
Step 5
After 2–3 hours, use a dry microfiber cloth to gently buff the tile surfaces and remove any remaining haze.
Step 6
Allow grout to cure undisturbed for at least 24 hours—avoid water contact, heavy use, or cleaning during this time; apply a grout sealer if desired for long-term protection.
Common mistakes
- Adding too much water weakens the grout, leading to cracking and crumbling within weeks.
- Wiping tiles before the grout has set slightly causes smearing and leaves stubborn residue.
- Skipping thorough joint cleaning results in poor adhesion and early grout failure.
- Applying grout in high humidity or damp conditions delays drying and invites mold growth.
- Not sealing grout in kitchen areas exposes it to grease, water, and stains that are hard to remove.
- Using the wrong grout type (e.g., unsanded in wide joints) causes gaps and weak spots over time.
When to call a professional
- Tiles are loose, cracked, or moving—this signals subfloor damage or failed adhesive beneath.
- Water leaks continue after regrouting—likely due to damaged pipes, faulty waterproofing, or structural issues.
- More than 30% of the grout needs replacement—professional-grade tools and experience are required for even results.
- Mold or mildew reappears quickly after cleaning and sealing—indicates hidden moisture or ventilation problems.
- You’re unsure of your tile material, underlayment, or plumbing layout—incorrect work risks further damage.
Want this done properly without the hassle?
Aap DIY try kar sakte hain, lekin agar time nahi ya confidence kam ho, to professional bula lena better hota hai. Galat step se damage ya safety issue ho sakta hai.




