
DIY Muslim Shower Installation: Step-by-Step Troubleshooting and When to Call a Professional
Want this done properly without the hassle?
Aap DIY try kar sakte hain, lekin agar time nahi ya confidence kam ho, to professional bula lena better hota hai. Galat step se damage ya safety issue ho sakta hai.
Quick answer (read this first)
- Always turn off the main water supply before starting.
- Use Teflon tape on all threaded connections to prevent leaks.
- Check water pressure before installing the shower unit to avoid damage.
- Ensure the drain pipe has a minimum 2% slope to prevent water pooling.
- Never force plastic fittings—hand-tighten only, then quarter-turn with a wrench.
Safety first
- Turn off the main water supply and confirm no water flows before cutting or connecting pipes.
- Wear gloves and safety goggles when handling pipes, fittings, or cutting tools.
- Never work on plumbing near live electrical wiring or outlets—water and electricity are a deadly mix.
- Avoid using excessive force on PVC or ABS plastic fittings—they crack easily under pressure.
- Do not attempt to modify gas lines, electrical water heaters, or load-bearing walls without professional help.
Tools you may need
- Adjustable wrench
- Teflon tape (plumber’s tape)
- Pipe cutter or hacksaw
- Plumber’s silicone sealant or waterproof putty
- Bucket and absorbent towels
- Measuring tape
- Screwdriver set (flathead and Phillips)
- Spirit level
- Plumbing flux and solder (if using copper pipes)
Step-by-step
Step 1
Turn off the main water supply at the meter or main valve, then open all faucets to drain residual water from pipes.
Step 2
Measure and mark the exact wall location for the shower valve, arm, and drain using a measuring tape and spirit level to ensure alignment.
Step 3
Cut water supply pipes to the correct length using a pipe cutter or hacksaw, ensuring clean, square edges for proper fitting.
Step 4
Wrap all pipe threads with 3–5 layers of Teflon tape clockwise, then hand-tighten the shower valve and arm into place before using a wrench for a final quarter-turn.
Step 5
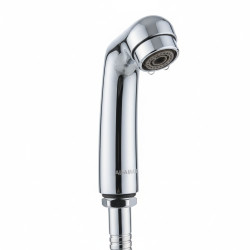
Connect the shower hose and head to the arm, then attach inlet lines to the valve using compatible fittings—ensure no cross-threading occurs.
Step 6
Install the drain assembly with proper slope (minimum 2% toward the outlet), seal the base with silicone, and test for leaks before tiling or finishing.
Step 7
Slowly turn the main water supply back on, check all connections for drips, and adjust pressure by testing flow at the showerhead—if pressure is too high, install a pressure-reducing valve.
Common mistakes
- Skipping Teflon tape on threads, leading to slow, hidden leaks that damage walls.
- Using mismatched pipe diameters—e.g., 1/2-inch valve with 3/4-inch supply lines—causing weak water flow or surges.
- Over-tightening plastic or PVC fittings, which cracks them and causes immediate or delayed leaks.
- Installing the shower without checking water pressure first—high pressure can rupture internal components.
- Failing to slope the drain pipe properly, resulting in standing water, mold, and foul odors.
- Ignoring wall backing or support behind the shower valve, leading to loose fittings and wall damage over time.
When to call a professional
- Water pressure remains too high or too low even after installing a pressure-reducing valve.
- You discover corroded, rusted, or outdated galvanized pipes behind the wall.
- Leaks persist after resealing all connections and replacing fittings.
- You need to cut into tiled walls, move existing plumbing lines, or modify structural elements.
- The water heater is not supplying consistent hot water or shows signs of malfunction, such as rust or strange noises.
Want this done properly without the hassle?
Aap DIY try kar sakte hain, lekin agar time nahi ya confidence kam ho, to professional bula lena better hota hai. Galat step se damage ya safety issue ho sakta hai.




