
DIY RO Plant Installation: Step-by-Step Troubleshooting and When to Call a Professional
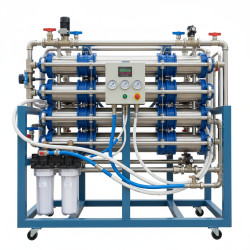
Want this done properly without the hassle?
Aap DIY try kar sakte hain, lekin agar time nahi ya confidence kam ho, to professional bula lena better hota hai. Galat step se damage ya safety issue ho sakta hai.
Quick answer (read this first)
- Turn off water supply, check for leaks, flush the system for 20 minutes, replace filters if water tastes odd, and call a professional if there’s no flow, electrical faults, or persistent leaks.
Safety first
- Always turn off the main water supply before starting any installation.
- Never handle electrical parts like pumps or power adapters unless you are certified.
- Wear gloves and safety goggles when cutting or connecting tubing to avoid cuts or chemical exposure.
- Do not force fittings—using improper force can cause pipe bursts, especially under Pakistan’s high water pressure.
- Ensure the drain line has a proper air gap to prevent sewage backflow into your purified water.
Tools you may need
- Adjustable wrench
- Teflon tape
- Bucket and absorbent towels
- Drill and wall anchors (for mounting under sink)
- RO system kit (filters, membrane, tubing, faucet, storage tank)
Step-by-step
Step 1
Turn off the main water supply and unplug any electrical components connected to the RO unit.
Step 2
Securely mount the RO unit under the sink using the provided brackets and wall anchors—ensure it’s level and stable.
Step 3
Connect the inlet tube to the cold water line using a saddle valve or T-fitting; wrap all threaded connections with Teflon tape to prevent leaks.
Step 4
Attach the drain line to the sink’s P-trap using a clip, making sure there is a minimum 1-inch air gap to avoid contamination.
Step 5
Install the storage tank in a supported position, then connect all tubing to the membrane, faucet, and tank—avoid sharp bends or kinks.
Step 6
Turn on the water supply slowly, open the faucet, and let the system flush for 15–20 minutes to remove manufacturing residues before testing water quality.
Common mistakes
- Omitting Teflon tape on threaded joints, leading to slow leaks that worsen over time.
- Kinking or pinching the tubing, which reduces water pressure and flow rate significantly.
- Skipping the initial flush, resulting in foul-tasting or cloudy water from carbon dust.
- Using low-quality, non-RO-rated hoses that crack or degrade in Pakistan’s hot climate.
- Placing the storage tank upside down or on an unstable surface, causing leaks or structural damage.
When to call a professional
- No water comes out of the faucet even after flushing and verifying all valves are open.
- Electrical parts show signs of sparking, burning smells, or fail to power on.
- Leaks continue after re-tightening all connections and replacing faulty fittings.
- You are uncertain about water pressure compatibility or plumbing line compatibility in your home.
- The tank fills very slowly, makes unusual noises, or doesn’t hold pressure properly.
Want this done properly without the hassle?
Aap DIY try kar sakte hain, lekin agar time nahi ya confidence kam ho, to professional bula lena better hota hai. Galat step se damage ya safety issue ho sakta hai.




