
How to Prevent Automatic Tank Switch Problems & When to Call a Pro
Want this done properly without the hassle?
Aap DIY try kar sakte hain, lekin agar time nahi ya confidence kam ho, to professional bula lena better hota hai. Galat step se damage ya safety issue ho sakta hai.
Quick answer (read this first)
- Regular cleaning of sensors prevents blockages and ensures accurate water level detection.
- Periodically check and tighten wiring connections to avoid electrical faults.
- Ensure the ATS unit has proper grounding for safety and stable operation.
- Protect the ATS unit from moisture and direct elements to prevent damage.
Safety first
- Always turn off the main power supply to the ATS and water pump at the circuit breaker before any inspection or maintenance.
- Never attempt complex electrical repairs without proper training; always call a qualified electrician or plumber.
- Use insulated tools when working near any electrical components to prevent shock.
- Wear appropriate personal protective equipment, including gloves and eye protection.
Tools you may need
- Screwdriver set (Phillips and flathead)
- Cleaning cloth or small, soft brush
- Pliers
- Multimeter (optional, for basic voltage checks if you are knowledgeable and confident)
Step-by-step
Step 1
Cut Power Supply: Locate the main circuit breaker controlling your water pump and ATS, and switch it off completely. Confirm there is no power before beginning any work.
Step 2
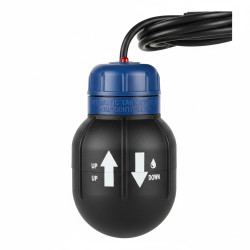
Clean Water Level Sensors: Carefully access and gently clean the water level sensors in both your overhead and underground tanks. Remove any accumulation of dirt, sediment, or debris that might impede their function.
Step 3
Inspect Wiring Connections: Visually examine all electrical wiring connections on the ATS unit and the water pump for any signs of looseness, fraying, or corrosion. If safe and competent, carefully tighten any loose connections.
Step 4
Check ATS Unit for Moisture: Ensure the Automatic Tank Switch unit itself is completely dry. Look for any signs of water ingress, excessive humidity, or pest infestation that could cause damage or malfunction.
Step 5
Test Manual Override Feature: If your ATS model includes a manual override switch, activate it to test its functionality. Confirm it can manually switch tanks or activate/deactivate the pump as intended.
Step 6
Restore Power and Monitor Operation: Carefully switch the main power back on. Observe the ATS through several water filling and switching cycles to confirm proper, automated operation without issues.
Common mistakes
- Ignoring small operational issues, which often escalate into more significant and costly repairs.
- Attempting advanced electrical repairs or modifications without the necessary training or expertise.
- Failing to completely shut off the main power supply before inspecting or performing any work on the unit.
- Allowing water level sensors to become heavily fouled with sediment, scale, or debris, leading to inaccurate readings.
- Installing or leaving the ATS unit in an exposed location where it is susceptible to water, dust, or physical damage.
When to call a professional
- If you notice burnt wires, unusual burning smells, or visible damage to any electrical components of the ATS or pump.
- When the ATS consistently fails to switch between tanks or activate the pump despite performing basic cleaning and checks.
- If you feel uncomfortable or unsure about safely handling electrical components, wiring, or troubleshooting the unit.
- For persistent power fluctuations or frequent tripping of circuit breakers specifically linked to the ATS or water pump.
- If the water pump runs continuously without filling the tank, or if it fails to start at all when required.
Want this done properly without the hassle?
Aap DIY try kar sakte hain, lekin agar time nahi ya confidence kam ho, to professional bula lena better hota hai. Galat step se damage ya safety issue ho sakta hai.




