
DIY Balcony Drain Opening: Step-by-Step Troubleshooting
Want this done properly without the hassle?
Aap DIY try kar sakte hain, lekin agar time nahi ya confidence kam ho, to professional bula lena better hota hai. Galat step se damage ya safety issue ho sakta hai.
Quick answer (read this first)
- Clear visible debris from the drain surface and opening.
- Attempt to flush minor clogs with a solution of hot water and dish soap.
- Use a plunger or a plumbing snake (or wire hanger) for persistent blockages.
- Never use corrosive chemical drain cleaners that can damage pipes.
Safety first
- Always wear rubber gloves and eye protection to prevent contact with debris and potential splashes.
- Never mix different cleaning chemicals; this can produce dangerous fumes.
- Be extremely cautious on wet or slippery balcony surfaces to avoid accidents.
- Ensure good ventilation if any strong odors are present from cleaning efforts.
Tools you may need
- Rubber gloves
- Eye protection
- Pliers or tweezers
- Old toothbrush or small brush
- Bucket
- Hot water
- Dish soap or mild detergent
- Plunger
- Plumbing snake (drain auger) or straightened wire hanger
- Flashlight
Step-by-step
Step 1
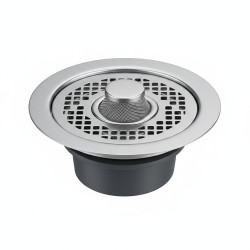
Clear Surface Debris: Begin by manually removing all visible leaves, dirt, and larger obstructions from the drain cover and surrounding area. Use hands, pliers, or tweezers for stubborn items.
Step 2
Inspect the Drain Opening: Using a flashlight, carefully look down the drain to identify the type and location of any obvious blockages. This helps determine the best approach.
Step 3
Apply Hot Water and Dish Soap: Pour a generous amount of very hot (not boiling) water mixed with a few squirts of dish soap down the drain. Allow it to sit for 15-20 minutes; this often helps to loosen grease and grime.
Step 4
Use a Plunger: If water isn’t draining, position a plunger firmly over the drain opening, ensuring a good seal. Perform several vigorous up-and-down thrusts to create pressure and dislodge the clog.
Step 5
Employ a Plumbing Snake or Wire Hanger: For deeper or more stubborn clogs, carefully insert a plumbing snake (drain auger) or a straightened wire hanger (with a small hook bent at the end) into the drain. Gently push and rotate to break up or retrieve the blockage.
Step 6
Flush and Test Drainage: Once you believe the clog is clear, pour another bucket of hot water down the drain. Observe carefully if the water flows freely and without backing up.
Step 7
Clean Up and Prevent Future Clogs: After successful drainage, clean any debris, spilled water, or cleaning solution from the balcony. Regularly remove leaves and dirt to prevent recurrence.
Common mistakes
- Pouring boiling water, which can damage PVC pipes.
- Using strong chemical drain cleaners that can corrode pipes or release toxic fumes.
- Forcing a plumbing snake, which can damage pipes.
- Ignoring recurring clogs, indicating a larger underlying issue.
- Not wearing protective gear.
When to call a professional
- If water still doesn’t drain after multiple attempts.
- If you suspect a main line blockage affecting multiple drains.
- If you hear gurgling sounds from other drains when using the balcony drain.
- If the balcony drain is overflowing or showing signs of structural damage.
- If you are uncomfortable or unsure about any step of the DIY process.
Want this done properly without the hassle?
Aap DIY try kar sakte hain, lekin agar time nahi ya confidence kam ho, to professional bula lena better hota hai. Galat step se damage ya safety issue ho sakta hai.




